
Have you been wanting to make some adorable painted wood signs, but you have awful handwriting, and you don’t want to buy stencils? Me too friend, me too! But don’t worry – I have an easy solution!
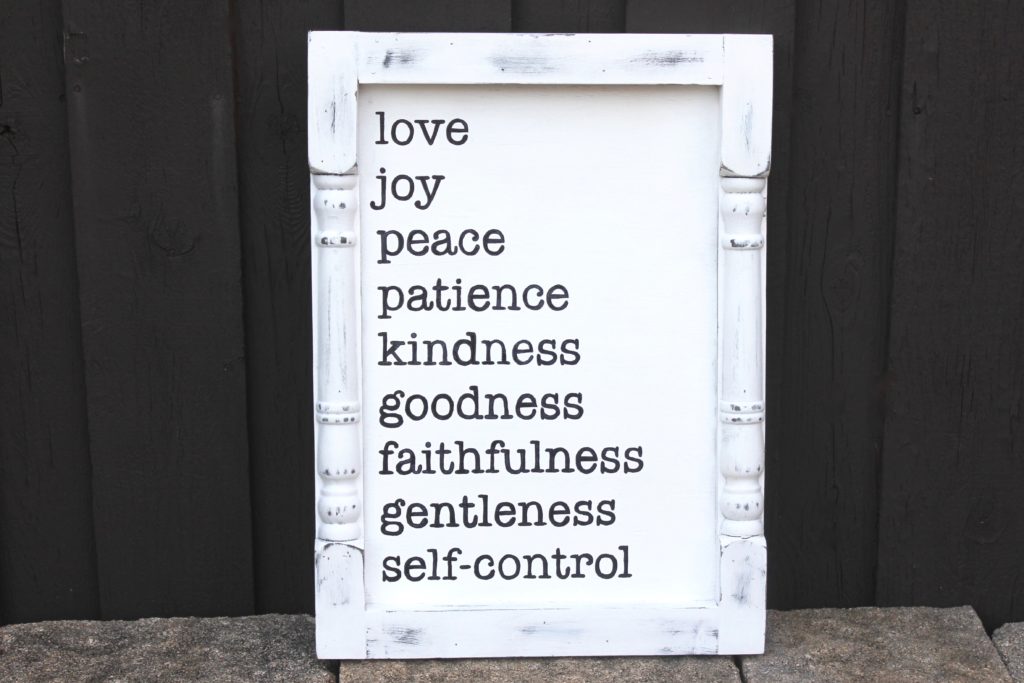
You can use this method on any piece of wood, or any of the blank signs available at Hobby Lobby and Michaels. For this specific sign (pictured above) I actually used a sign I bought at Hobby Lobby that had a different phrase on it when I bought it. I loved the “bones” of it (i.e. the adorable frame), but not the phrase. Since it was on clearance for only $11, I snatched it right up.
If you’re using a blank sign, scroll down to the graphite transfer method. But, if you want to repurpose an old (or new) sign, look at the instructions right below.
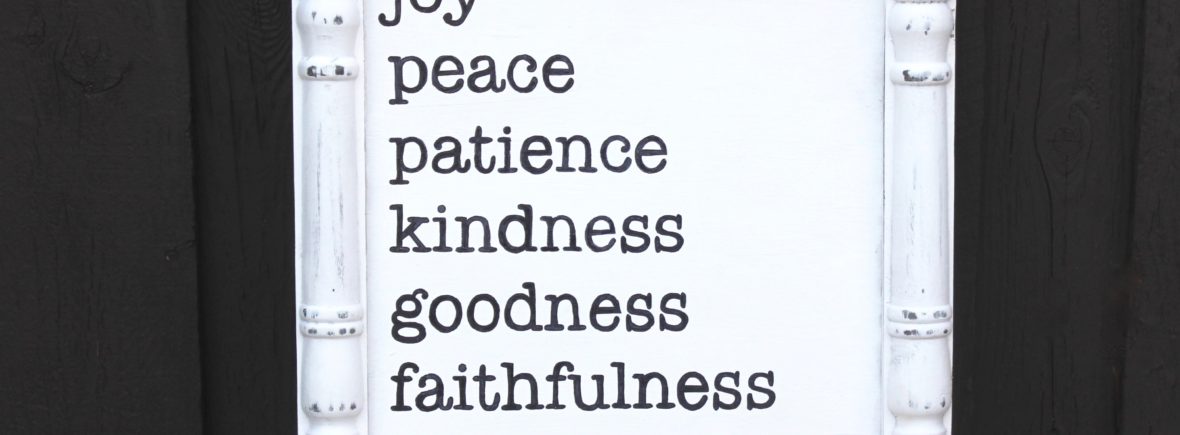
This is the original sign, exactly the way I bought it from Hobby Lobby. It’s super cute, but not what I had in mind. I’ve really been wanting a sign with the fruit of the spirit on it, and I thought it would fit perfectly on this sign.
How to repurpose a sign:
1. Use sandpaper to sand over the original wording to make it easier to paint over. If the wording is already light, you might not have to sand it.
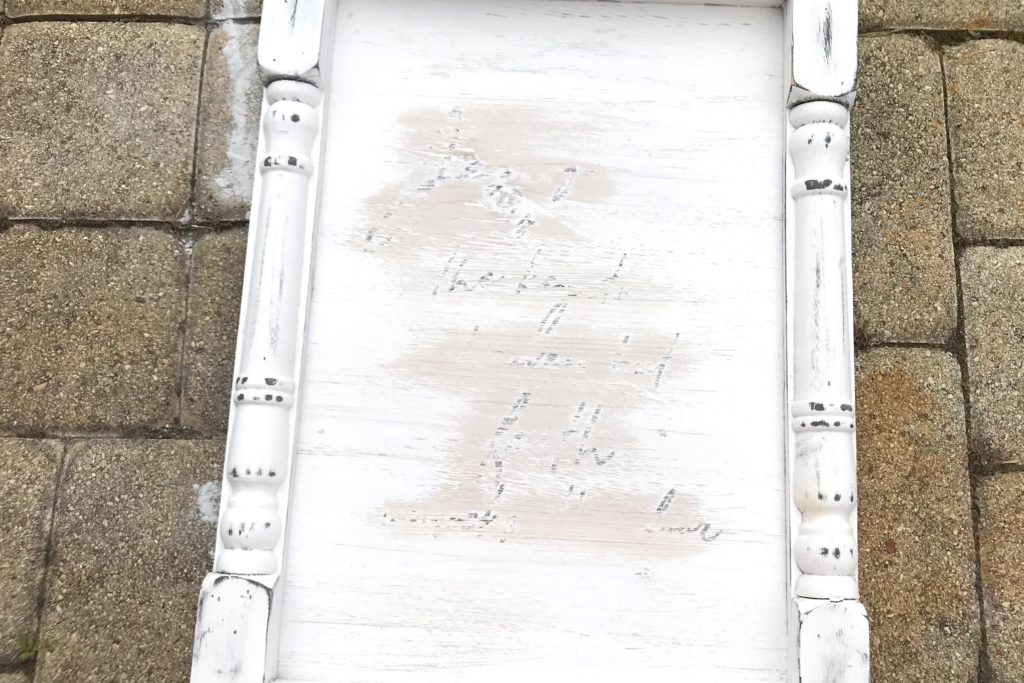
2. Once the wording is faded, paint over it with your desired color. I used white paint, and it took 2 coats.
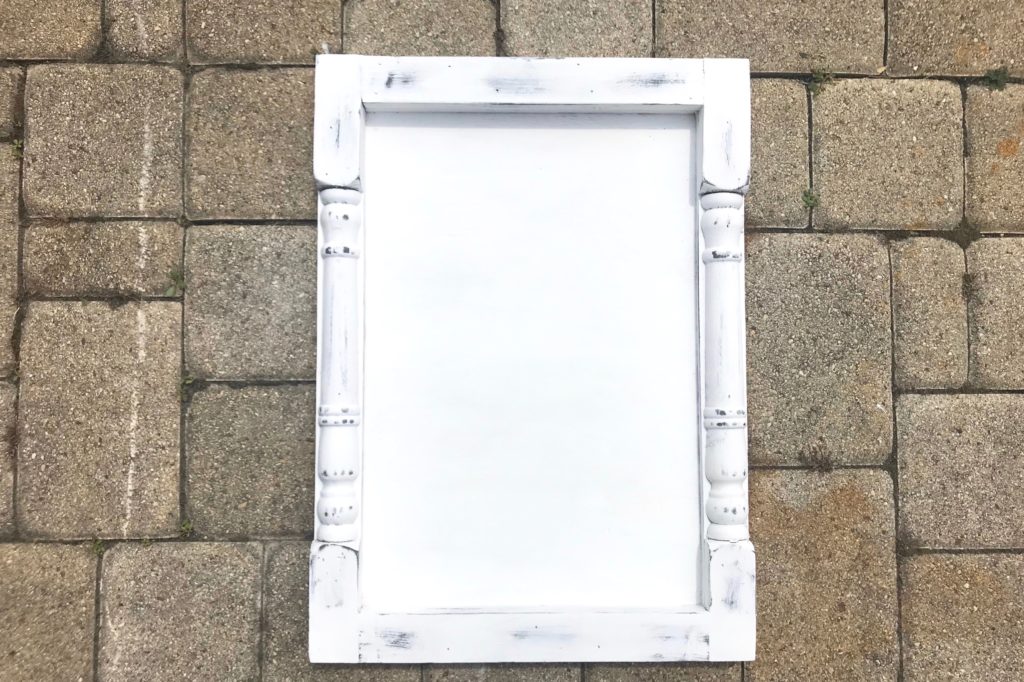
Now you have a blank sign, ready for you to put your favorite phrase on!
The Graphite Transfer Method
Supplies:
- sign – if you aren’t repurposing a sign, you can make your own sign using old wood, or you can buy a blank sign. Click here for Hobby Lobby’s blank signs, or click here for Michaels’ blank signs.
- pencil (or chalk if your sign has a dark background)
- pen
- sharpies – it might take several to do one sign, so have several on hand
- access to a computer/printer
- tape
Disclosure: My posts may contain affiliate links. If you buy something through one of those links, you won’t pay a penny more, but I may receive a small commission, which helps me keep this DIY blog up and running, and partially supports my Coke Zero addiction. This includes links to amazon.com, because I am a participant in the Amazon Services LLC Associates Program.
Instructions:
1. Decide on your desired phrase, words, date, etc.
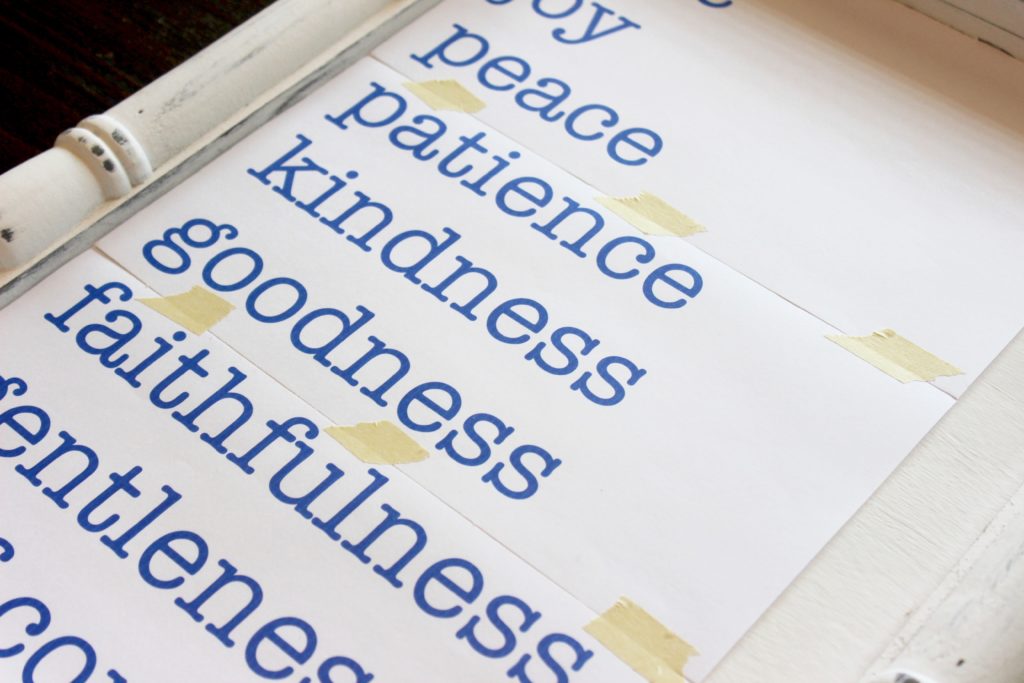
2. Use a computer to format the wording for your sign, and print it off – I used Microsoft Word. If your sign is large you might have to spread the wording across several pieces of paper. You will want to measure your sign so that you know what size font you need to use. I printed my words in blue ink so that it would be easier for me later on – you’ll see why below! (In case you’re wondering – I used American Typewriter font, in size 120 pts)

3. Cut the pages down so that they can be taped together (if needed) without the paper overlapping. Make sure it fits the way you want before taping the pages together. If you are doing words that are spaced further apart you might not need to tape the papers together at all.

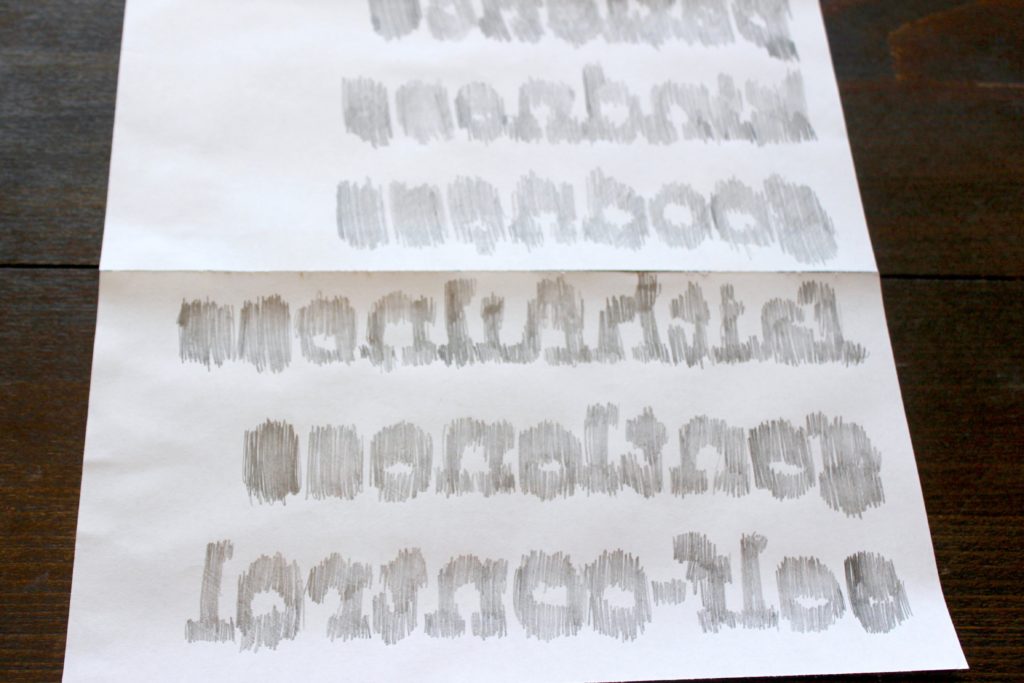
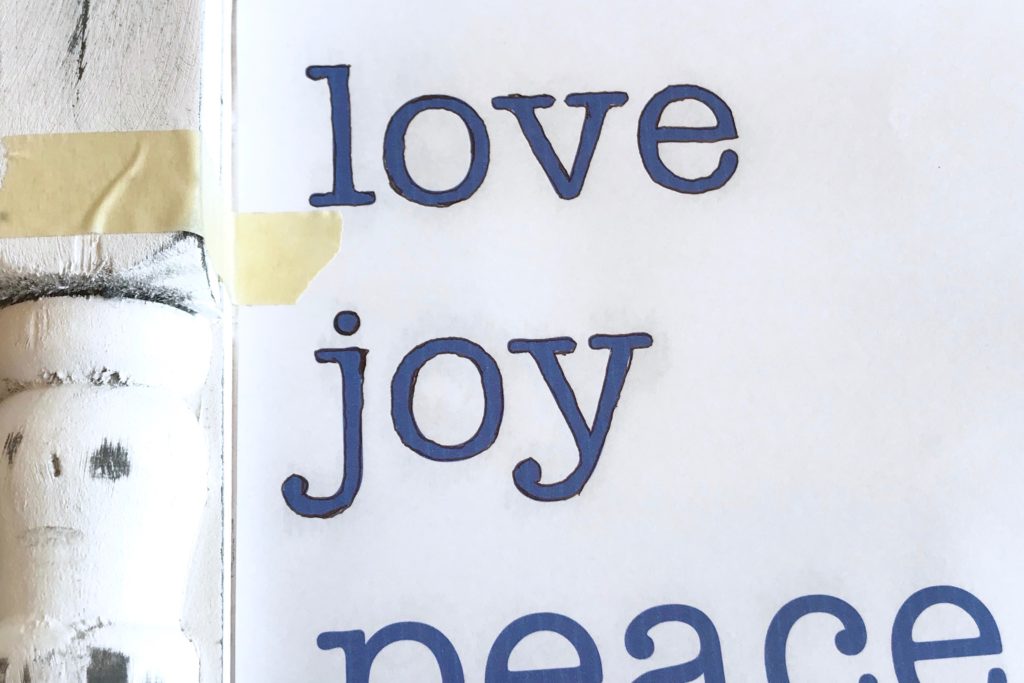
4. Turn the papers over, and use a pencil to color the backside of the words. Make sure that you cover every area where your words are. You don’t have to do this neatly – you can just scribble all over the back of the paper if you want to! *Note – if your sign has a dark background, you can use chalk on the back of the printer paper to transfer onto the sign instead of graphite/pencil. Then you could use white (or any color) paint/paint pen to fill in the letters.

5. Tape the papers to your sign so that they can’t wiggle around at all. Make sure that you don’t cover up any of the letters with tape.
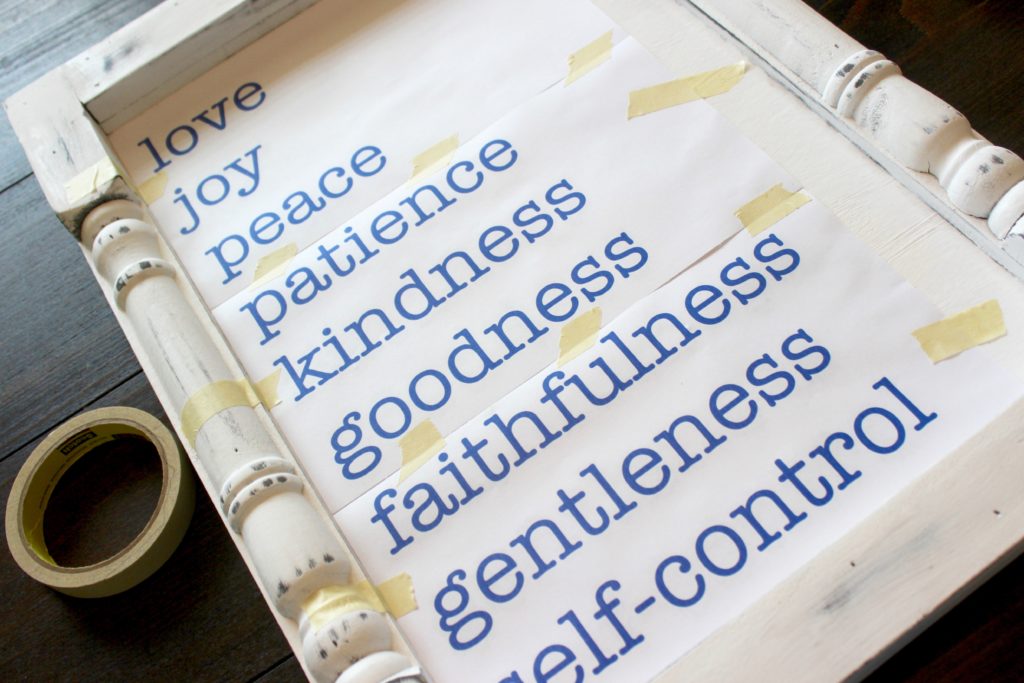
6. Outline each letter with a pen. When you outline the letter, the pressure from the pen will transfer the graphite onto the sign! I used blue ink when I printed off my words because it is much easier to outline the letters nicely with a black pen on top of blue ink then it is to outline with a black pen over black printer ink – trust me!


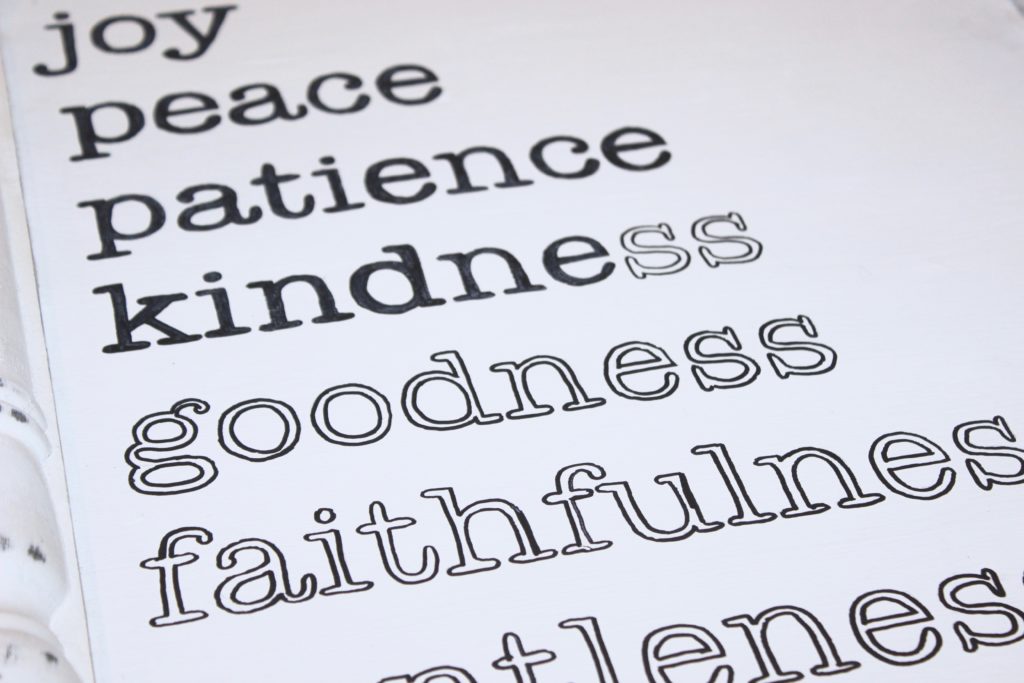
7. Fill in all of the letters with a sharpie. If your sharpie seems to run out of ink, stand it up (tip side down) so that more ink can make its way to the end of the sharpie. I typically go through about 2-3 sharpies when making a sign, so make sure you have several on hand.

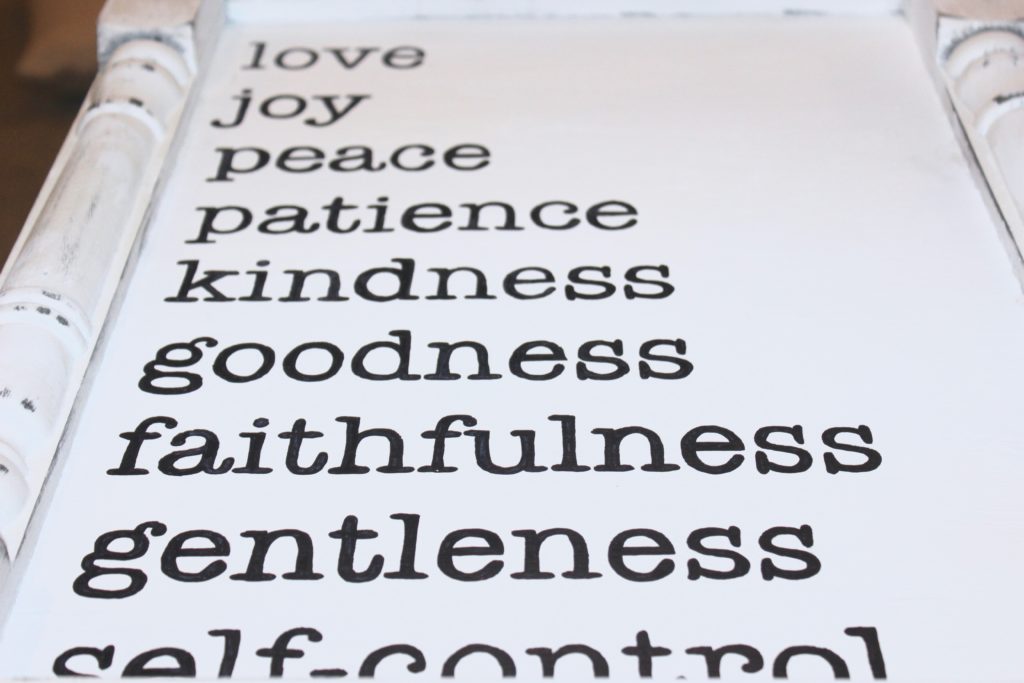
That’s it! Now you have a super cute sign!
Never miss a post!