
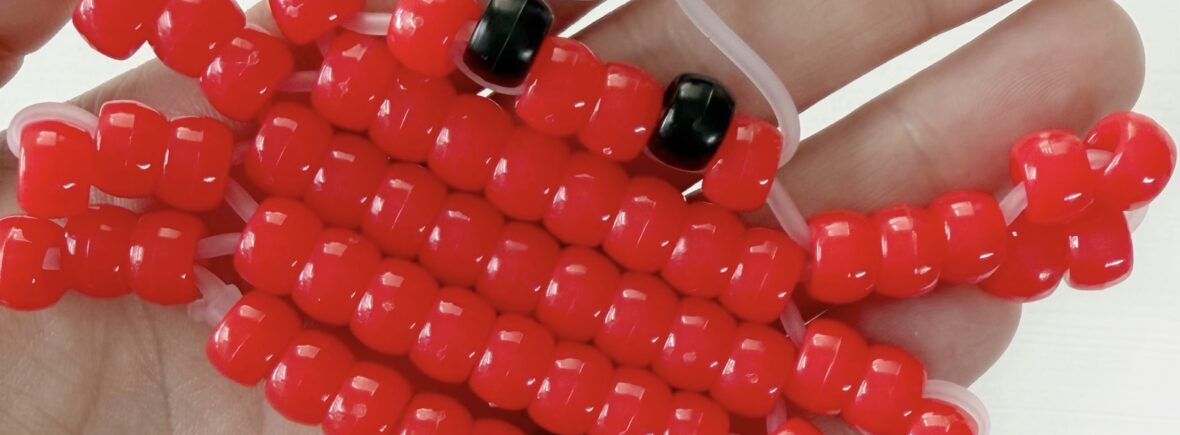
Bring a little beachy fun to your keychain collection with this adorable pony bead crab! 🦀 This easy DIY craft is perfect for summer, ocean lovers, or anyone who loves making cute little animals with pony beads. Grab your pony beads and follow along to create your own tiny crab friend that’s ready for all your adventures!
Supplies:
- pony beads
- pony bead lacing – I used the color “frost.” I cut mine to 48″ (4 feet) for this specific keychain
- keychain
- gaff tape *optional* this is the tape I use to hold the keychain clips on to my table while make the keychains. This tape is very strong but does not leave behind sticky residue etc.
Disclosure: My posts may contain affiliate links. If you buy something through one of those links, you won’t pay a penny more, but I may receive a small commission, which helps me keep this YouTube Channel up and running, and partially supports my Coke Zero addiction. This includes links to amazon.com, because I am a participant in the Amazon Services LLC Associates Program.
Crab Pattern: R = Red, B = Black (Full tutorial linked below)
- Row 1 – R B R R B R (do NOT put the right side of lacing through the black beads)
- BEFORE Row 2 – make the pinchers. To make the pinchers put 7 beads on the left piece of lacing. Separate the 7 beads into 3 beads (closer to the body) and 4 beads (closer to the end of the lacing). Then stick the lacing back through the 3 beads closest to his body. Repeat on the right side. Make sure you scooch the legs as close to his body as possible.
- Row 2 – 8R
- BEFORE Row 3 – make 2 legs. Put 3 beads on the left piece of lacing. Separate the 3 beads into 2 beads closer to his body and 1 closer to the end of the lacing. Put the lacing back through the 2 beads closer to his body. Scooch the leg as close to the body as you can. Repeat on the right side.
- Row 3 – 9R
- BEFORE Row 4 – make 2 more legs, just like last time – 3 beads for each leg.
- Row 4 – 8R
- BEFORE Row 5 – make 2 more legs, just like last time.
- Row 5 – 7R
- Tie knots on both sides of the bottom row (between the last beads on the row and the bottom legs).
Ta-da! The cutest little crab ever!
Instructions: Watch the video below!
While you’re here, check out some of my other popular crafts!
Never miss a post!