When I was in high school my best friend and I used to write notes to each other constantly – I mean who didn’t, right? But we started getting tired of all of the loose notes floating around in our backpacks, so we started writing in a notebook – an actual spiral notebook that we would pass back and forth to each other. This way all of our secrets (you know, high school crushes lol) were safe in one special notebook. Plus if we were writing a note in class it just looked like we were taking notes in our notebook. I know, I was such a rebel – ha! Anyways, we would fill up a notebook and then move on to a new one. I still have several of these notebooks, and they are hilarious to go back and read!
So why am I telling you about all of this high school nonsense? Because I decided that I want to start a notebook with my six-year-old daughter. She loves writing and drawing. She is constantly writing stories, making cards for her friends and family, making signs to hang around the house, writing me sweet notes, etc. I asked her if she would want to write me a note in a special notebook, and then I’ll write her a note back, and we can just keep writing back and forth to each other in this special notebook. Her eyes lit up, “a special notebook just for you and me?!” “Yes!” I said. “Yes, yes, yes! Can we start now?!” she asked.
Little kids are so excitable, and I love that about them! And I know that there are some things that she is just more likely to share with me through writing, over talking. When she’s telling me about her day, and her deep thoughts, her little sisters are always listening, and it’s easy for us to get interrupted. I think this notebook will be a really fun way to continue to grow the awesome relationship that we already have. I also plan to continue this with her as long as she is willing, and I’ll start notebooks with my other two girls when they are a little older.
So, whether you are making a notebook to share with your bestie/daughter/mom/boyfriend/hubby/dog (just kidding about the dog, don’t do that…that’d be weird), or you’re making a diary/journal for your own personal thoughts, this is a super easy and fun way to decorate your notebook and make it your own.
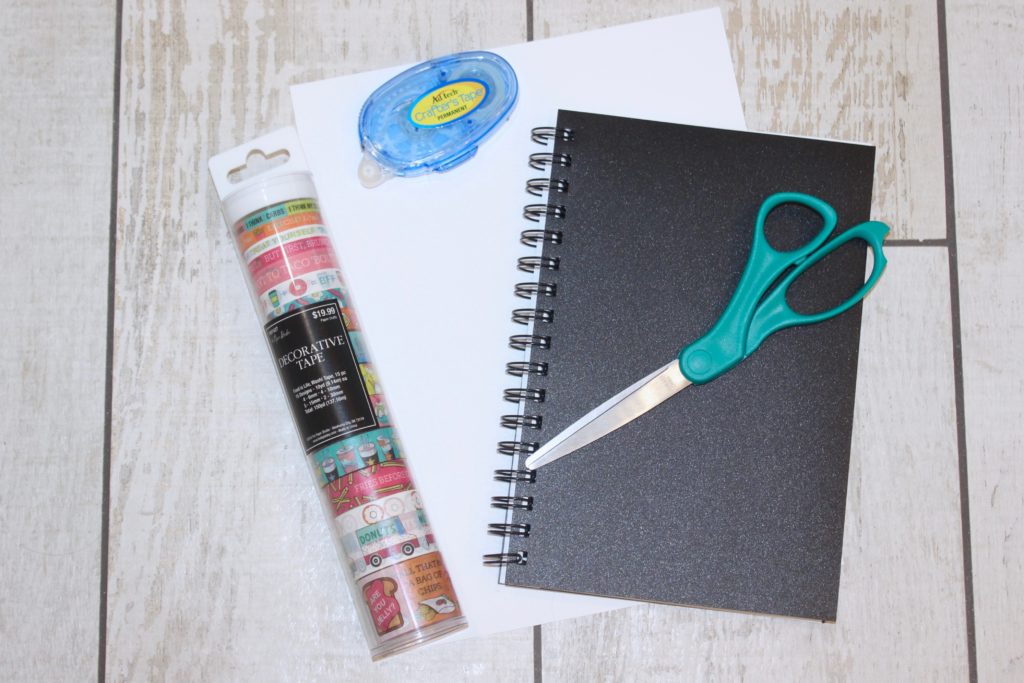
Supplies:
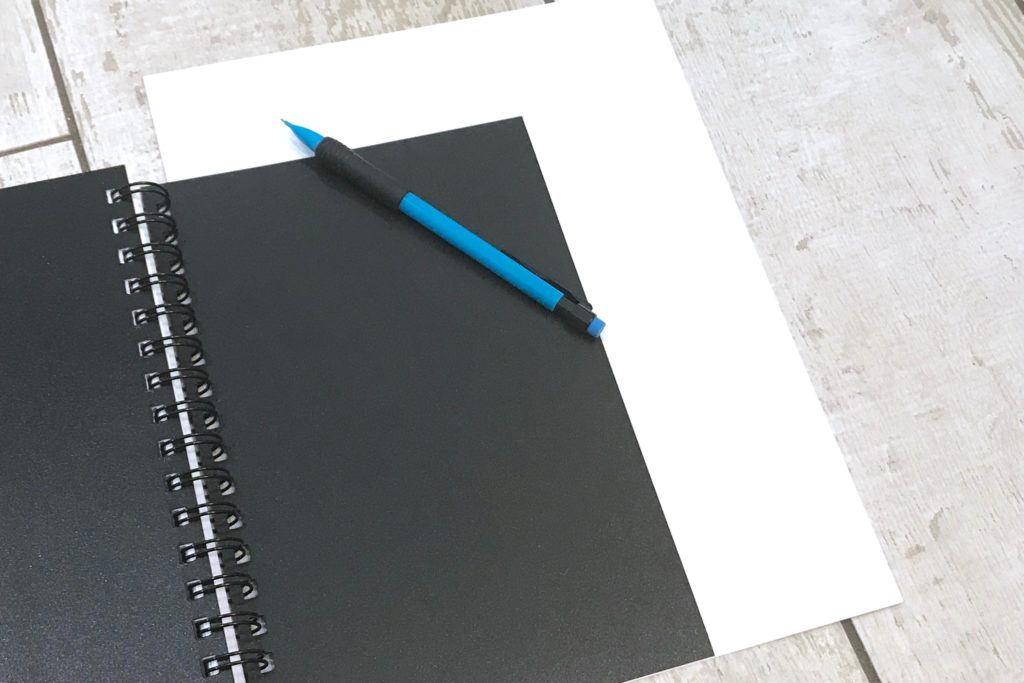
- notebook – to get the sketch book I used from Target click here, or to get the exact same sketch book from Amazon click here. You can obviously use a normal spiral notebook if you want to. I used a sketch book because I wanted it to be unlined so that we could add little doodles and drawings wherever we want – plus the rings of the binding are bigger and more fun to decorate 🙂
- white cardstock paper – click here to buy from Amazon, and here to buy from Michaels
- craft tape – click here to buy from Michaels, or click here to buy from Amazon
- washi tape – click here to shop Michaels washi tape, or click here to shop washi tape from Amazon. *note – the washi tape I used was from Hobby Lobby, and is no longer available – but there are tons of great options through the links above!
- trim/embellishment ribbon (optional) – pom pom ribbon from Amazon
- ribbon (optional) – You may or may not want to use ribbon, depending on what kind of notebook you use. If you want to use ribbon, you can find a bunch of great options HERE. I used a bunch of 3/8″ ribbon that I have collected over the years.
Disclosure: My posts may contain affiliate links. If you buy something through one of those links, you won’t pay a penny more, but I may receive a small commission, which helps me keep this DIY blog up and running, and partially supports my Coke Zero addiction. This includes links to amazon.com, because I am a participant in the Amazon Services LLC Associates Program.
Instructions:
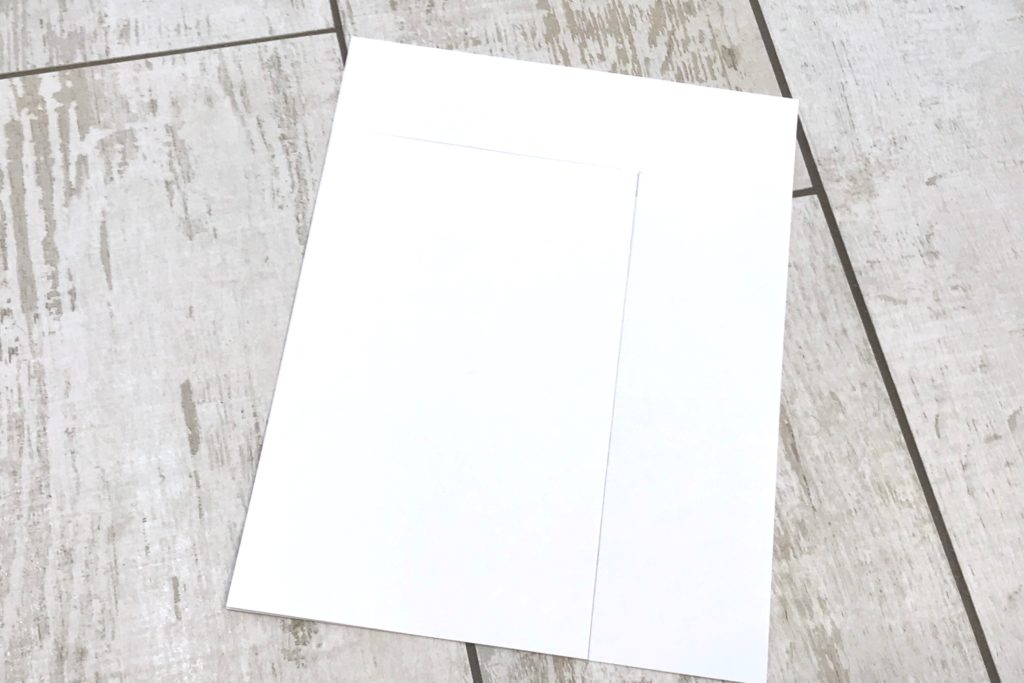
- Cut a piece of cardstock to the size of the front cover – I just traced around the cover to make it easy.

- Tape the cardstock to the front cover using the crafter’s tape.
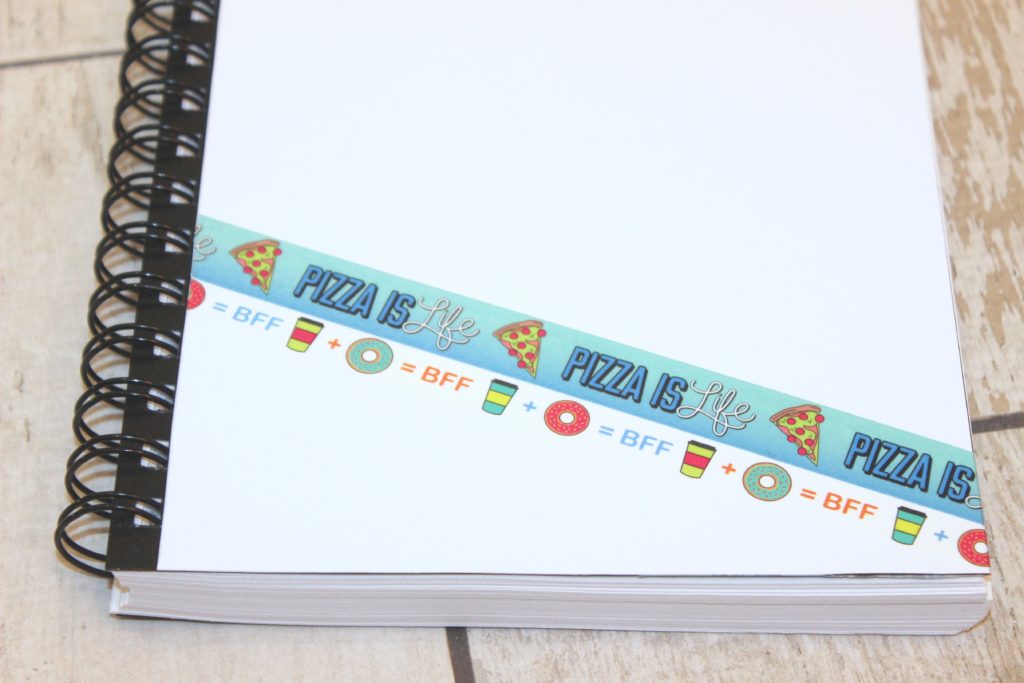
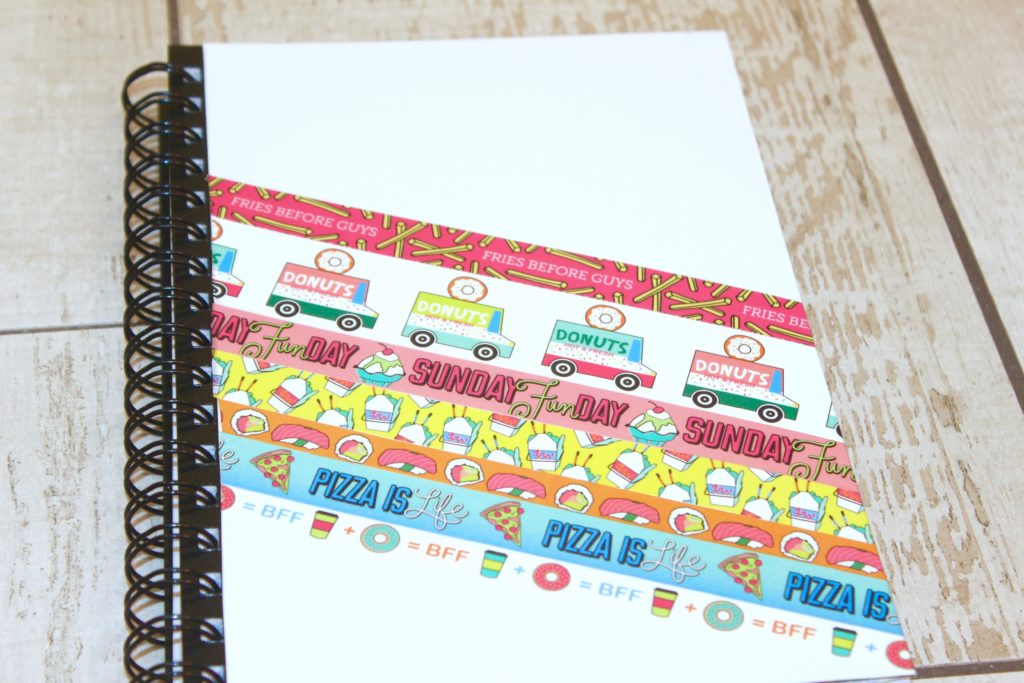
- Put strips of washi tape on the cardstock. You can do this however you want (vertical/horizontal/diagonal/chevron etc). I did my tape on a diagonal and put the first piece more towards the middle. I started the tape near the binding and then continued laying it down all the way across the cardstock and continued it onto the back side of the cover.
- If some of the washi tape is sticking off of the cardstock where you started it, just trim it with scissors. I didn’t bother trimming mine perfectly straight because I knew I would want to use some kind of trim over the edge anyways.
- You can make the back side of the cover look as nice as you want to. I continued the washi tape all the way on the back side of the cover just for the heck of it, even though I didn’t put cardstock on that side. It just makes it look a little more finished, rather than having uneven edges of washi tape all over the back.
- Continue taping the entire front cover until you are done
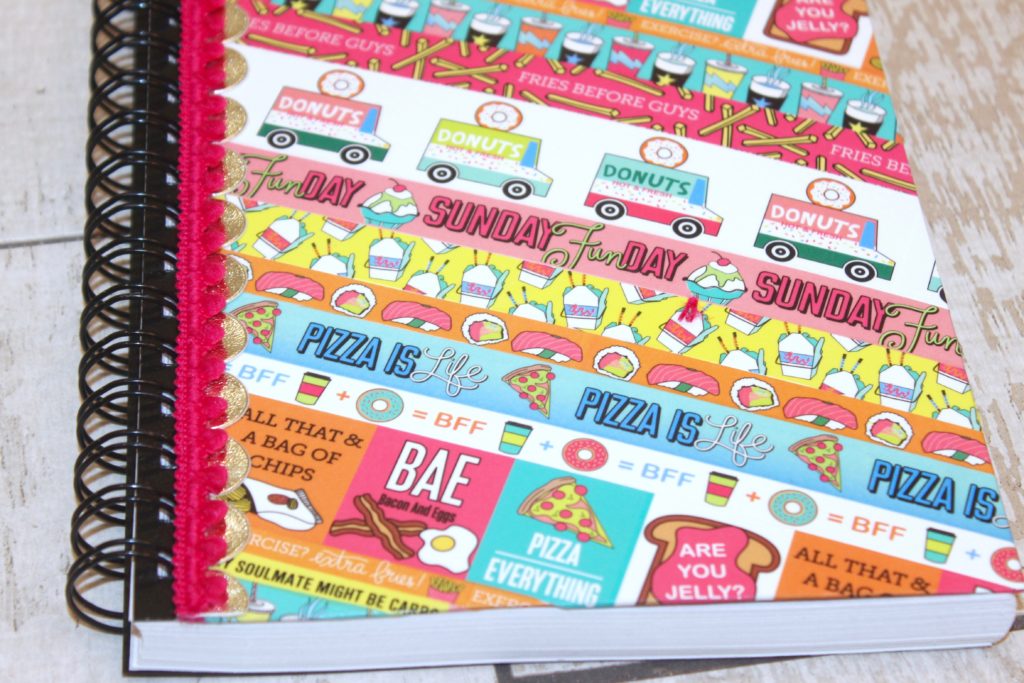
- *OPTIONAL* Use trim/embellishment ribbon to cover up the edge of the cardstock closest to the binding. This trim piece will cover up any imperfections of where the washi tape pieces start, in case they’re a little uneven.

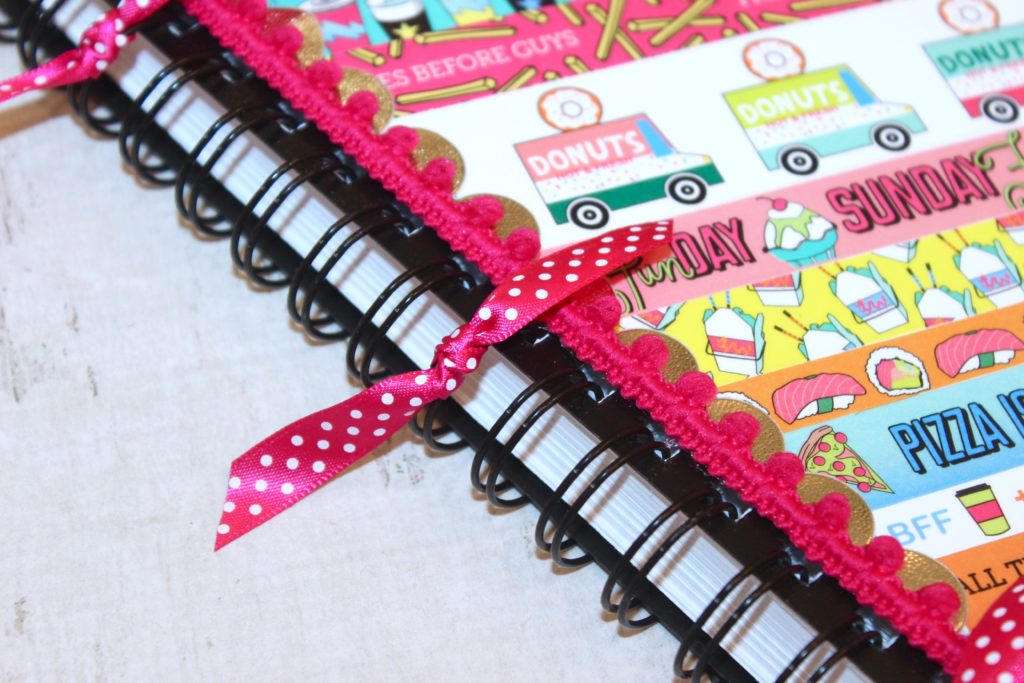
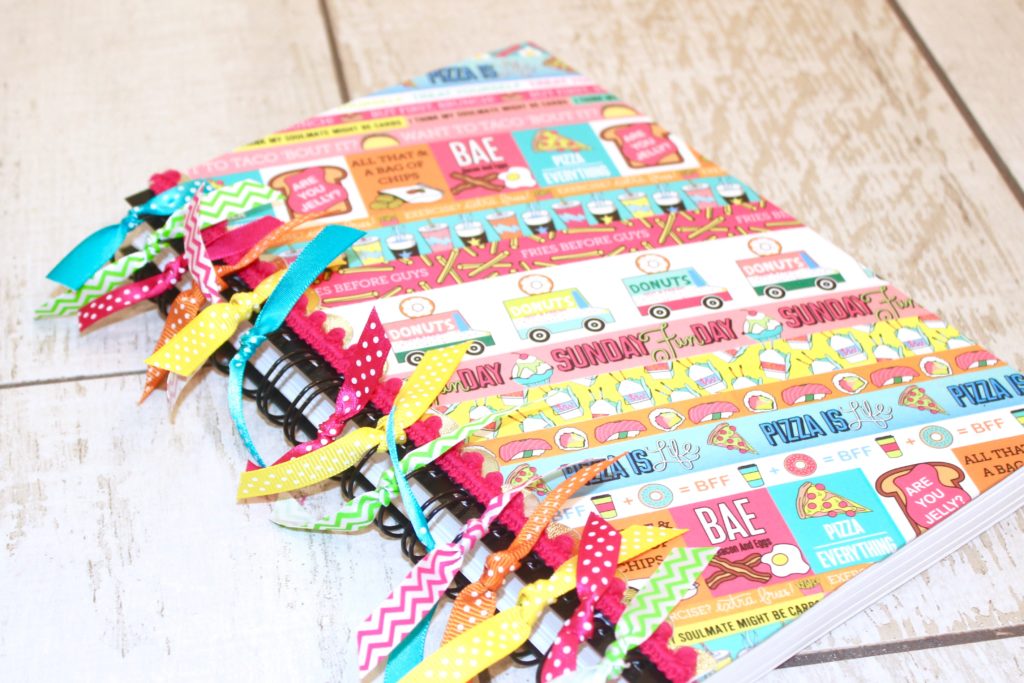
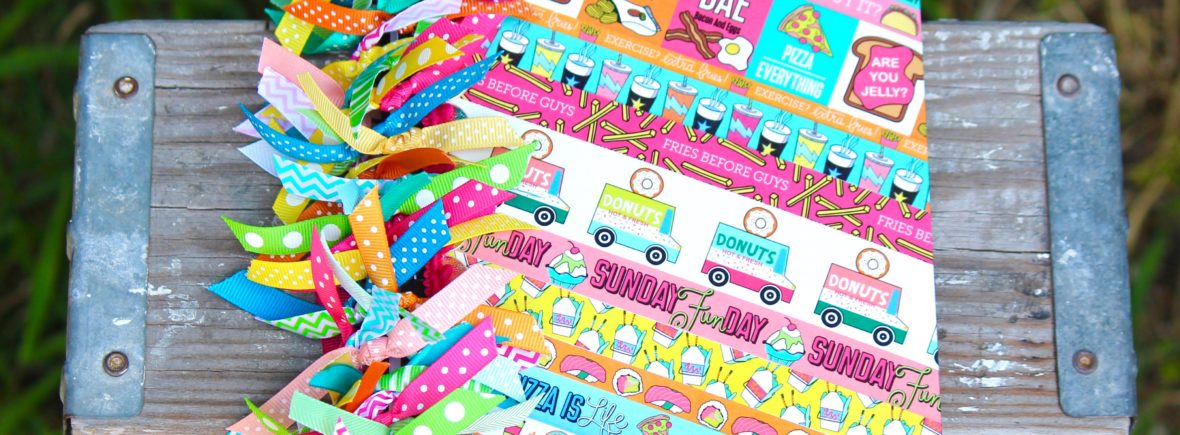
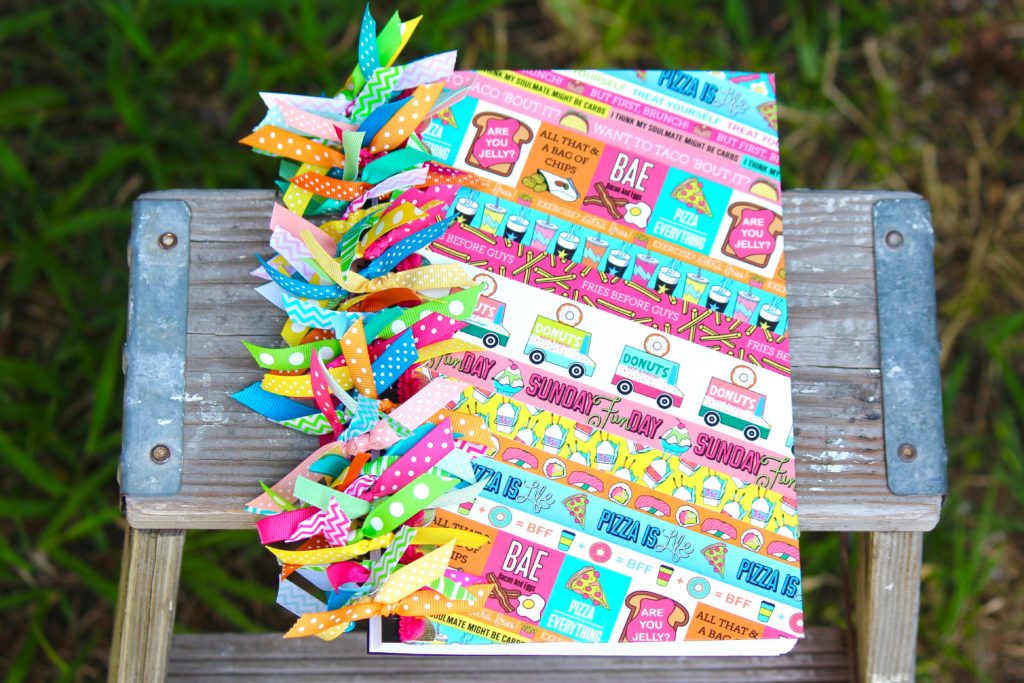
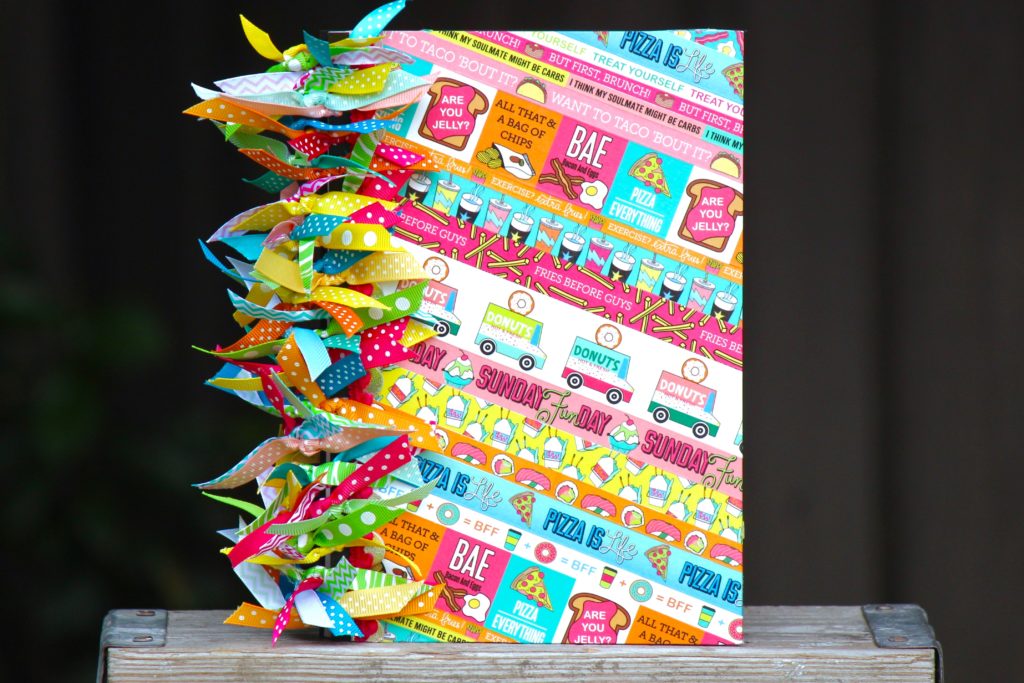
- *OPTIONAL* Cut pieces of ribbon and tie them to the binding of the sketch pad. I got a little carried away with the ribbon and put three ribbons on each ring!
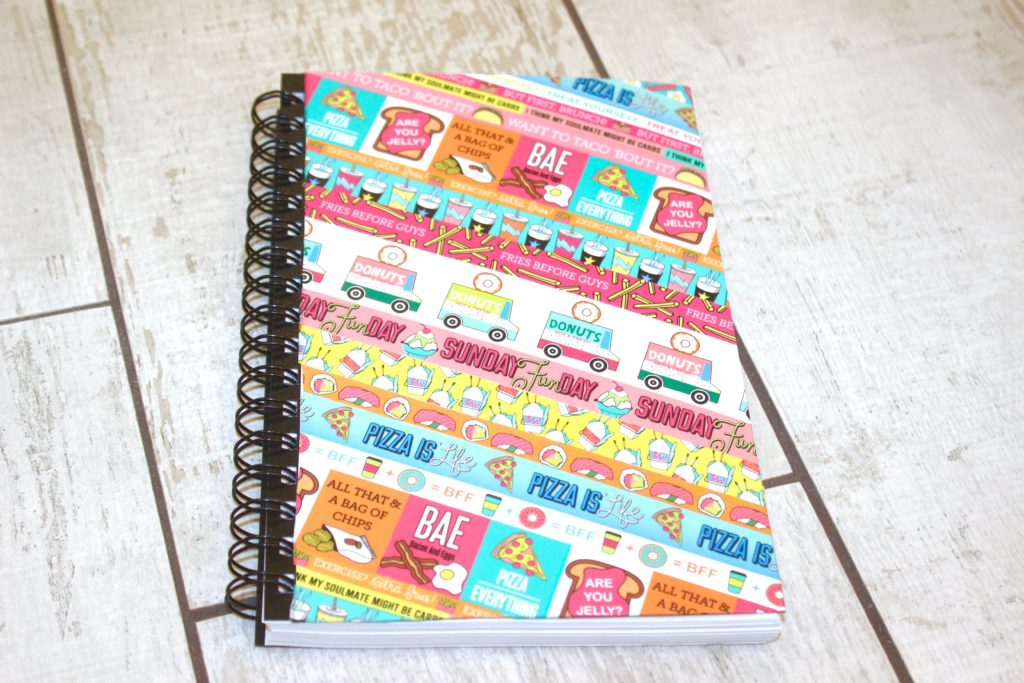
Ta-da! I mean could this notebook be any cuter??! I don’t think so! Keep scrolling to see a few more pics!
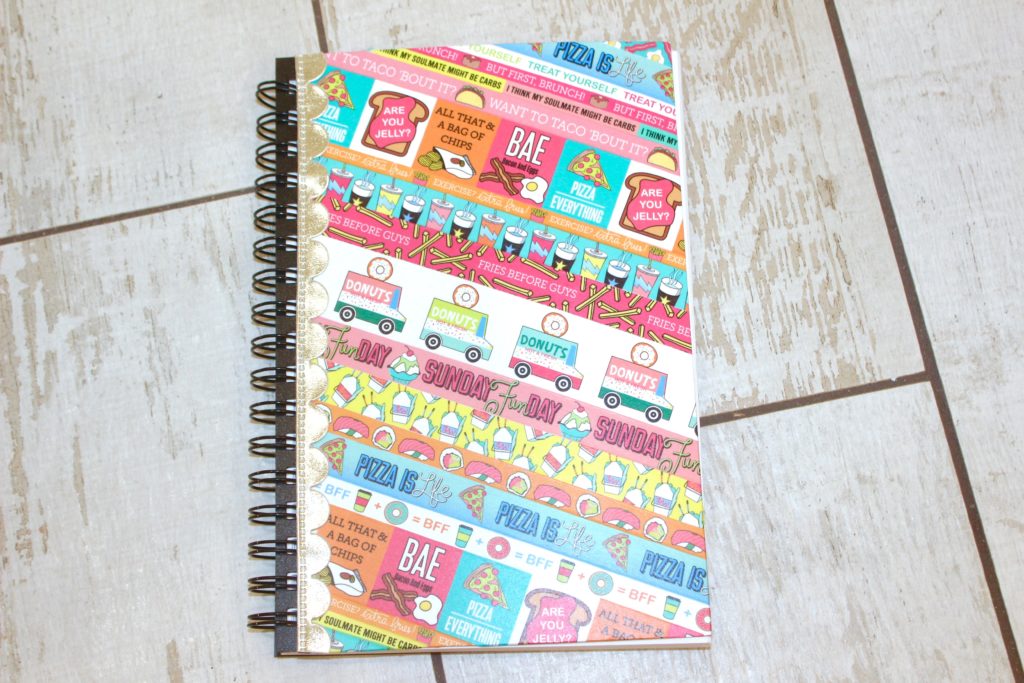
This is the back side of the cover – I continued the washi tape all the way from the front onto the back cover.
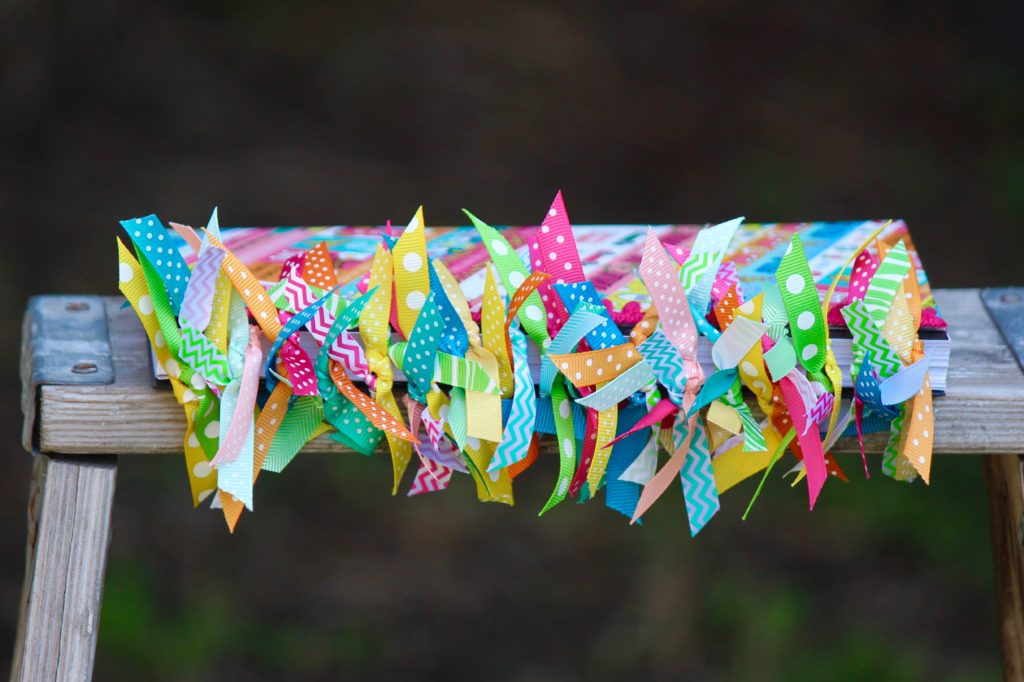
Look at all of the fun ribbons! I can’t even handle how cute it is!
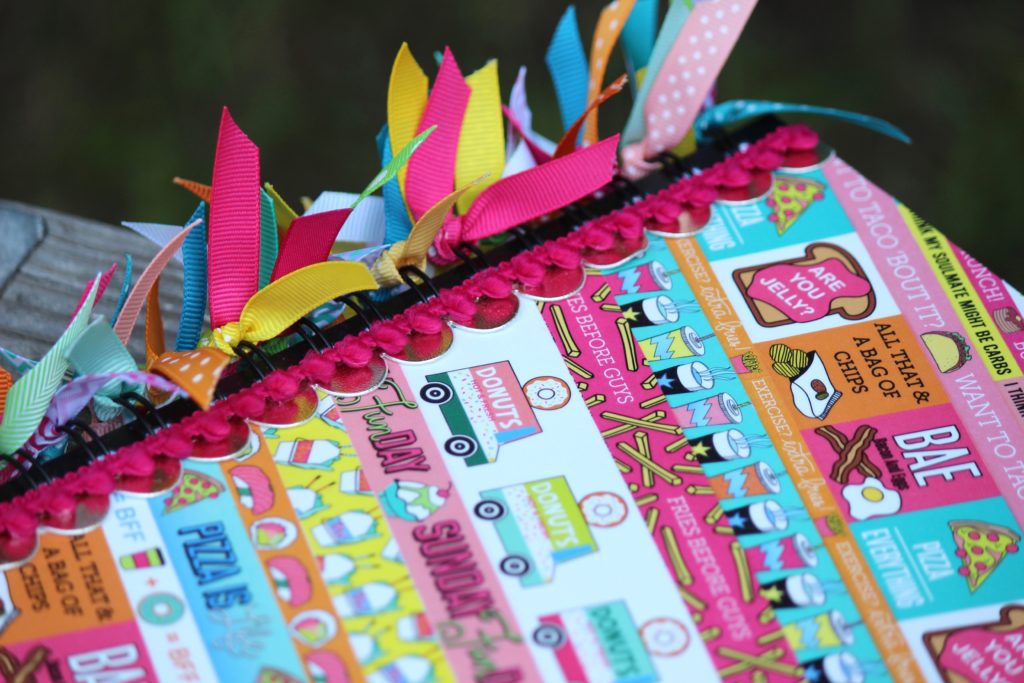
Here’s a great picture of the trim.
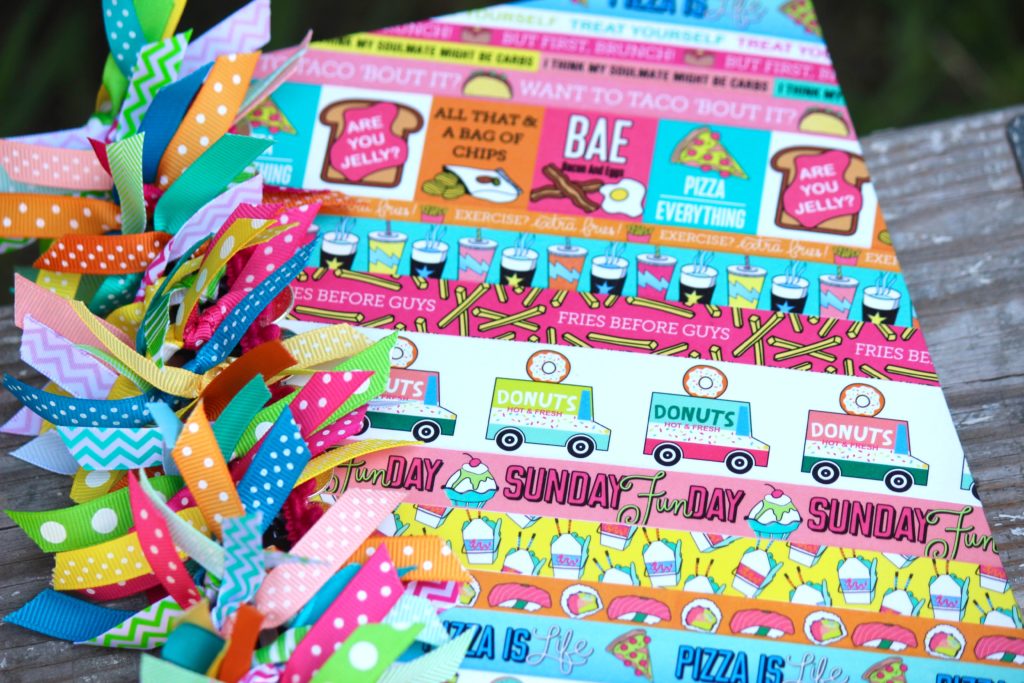
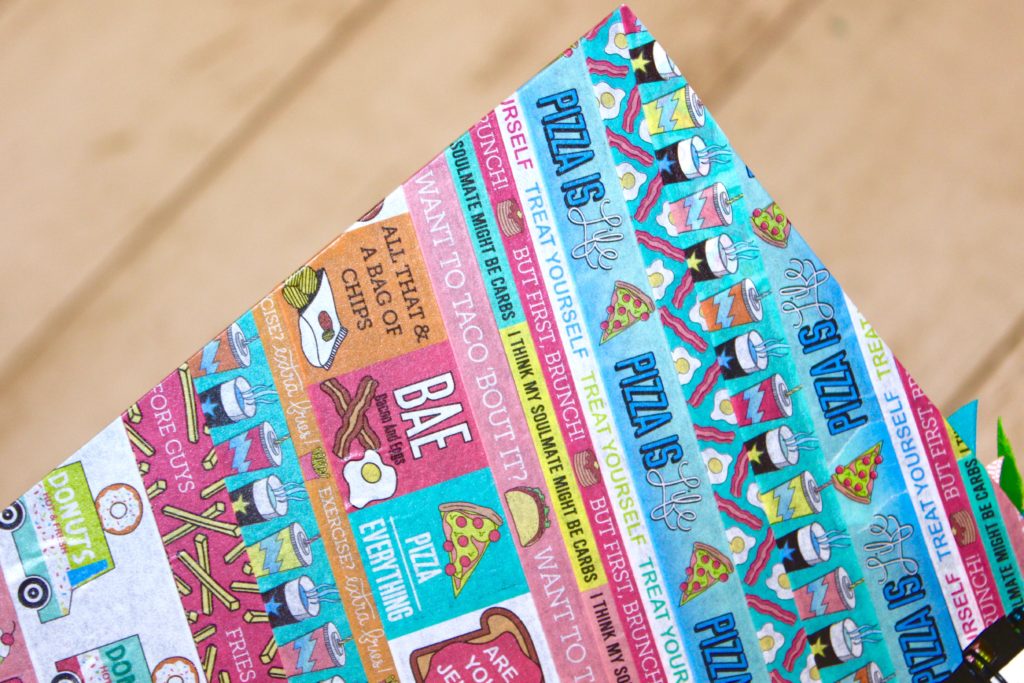
This washi tape might be my favorite ever!
I can’t wait to see how your notebook turns out! As always, tag me on Instagram @shescraftyandsheknowsit with your masterpiece! I always love to see what all of you come up with!
Never miss a post!
Absolutely adorable! Going to make one..
I just found your comment Mallory, and it made my day! I’m so glad you liked it! My oldest daughter, Macie, and I still love sharing it to write each other notes!