
We’ve had the same old trash can in our master bedroom for years, and I’ve hated it for, well . . . years. I honestly don’t even know why I’ve kept it this long. It’s not cute, it’s too small, and it has several pieces of gum stuck to the inside of it. TMI? Sorry!
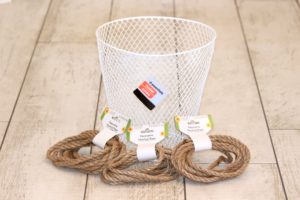
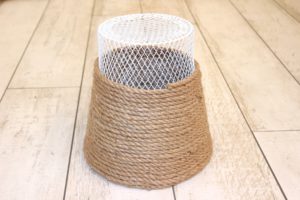
Lucky for me, on one of my many shopping trips to Dollar Tree to get more books to make more book stacks, I found a white metal trash can. I put it in my shopping cart and thought, “Hey, this is actually cuter than the one we have now, and it’s only $1. Can’t beat that!” I had no intentions of sprucing it up or doing anything to it. Well that was until I made it a couple of aisles over and found rope. Who knew Dollar Tree had rope?! And nice rope at that! I found it in packages of 9.5 feet – for $1! *Note – I did NOT buy enough rope on my first trip because I underestimated how much it would take to cover that bad boy, and on my second trip to a different Dollar Tree I found that their packages of rope had 13 feet of rope, instead of 9.5 feet. It was my lucky day! Either way, pay attention to how much rope is in the packages that you buy so that you get the right amount!
Supplies:
- hot glue gun and glue sticks
- Dollar Tree trash can, or a cheap metal trash can from anywhere
- rope – it took 86 feet of rope to cover the trash can. Can you even believe it took that much rope? That’s over 28 yards of rope – which is over a quarter of a football field! Mind blown! Anyways, on to the directions!
Directions:
- plug in your hot glue gun so that the glue can start heating up
- glue rope to the top rim of the trash can, working your way around the rim little by little to ensure that it’s staying in place.
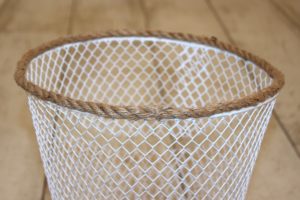
- once you make it back to where you started gluing the rope, cut the rope and glue it to the beginning piece, so that it makes one neat circle of rope. You want the top to look good!
- now turn the trash can upside down so that the rope you just glued on to the trash can is sitting on your floor/table.
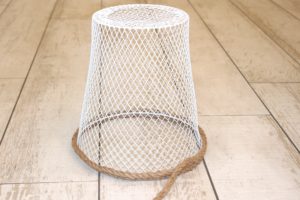
- after I glued that first piece of rope on the rim of the trash can, I did NOT glue the rope to the trash can at all, because it would ooze through the openings of the trash can. I ONLY glued the rope to the other rows of rope. So, now that the trash can is upside down, put glue along the piece of rope that you just finished putting on the rim. Continue gluing the new row onto the row below it until you run out of rope.
- when you run out of rope, glue a new piece to the end of the last piece, and continue gluing the new piece of rope to the rows below it.
- continue gluing the rope around the trash can until you reach the bottom of the trash can.
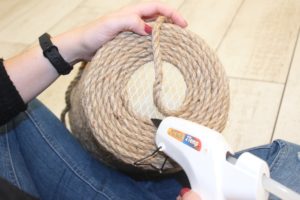
- when you get to the bottom of the trash can you’re going to keep gluing the rope in concentric circles. I found it easiest to lean the trash can into my lap and turn it little by little as I glued the rope to the pieces below it. (see the picture above)
- when I got close to the center of the bottom, I spiraled the rope into tiny circles the way it would be (without gluing it) so that I could get an idea of how much more rope I would need. Then I cut the piece to the approximate length so that it would be easier to work with.
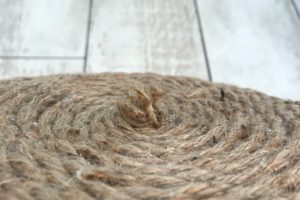
- as I worked my way toward the center of the bottom, the piece of rope started to fray. By the time I glued it down it looked like this (see the picture above). If this happens to you don’t panic!

- all I did to fix it was cut off all the frayed ends, and then smash the rest into the glue.

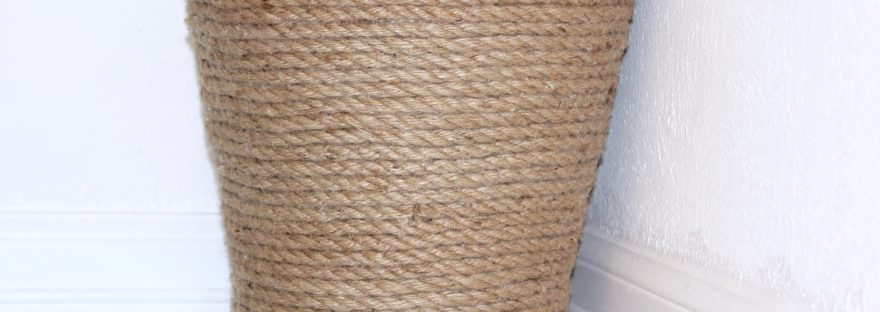
Now you have a super cute trash can, to fill with . . . trash, ha!
Never miss a post!