
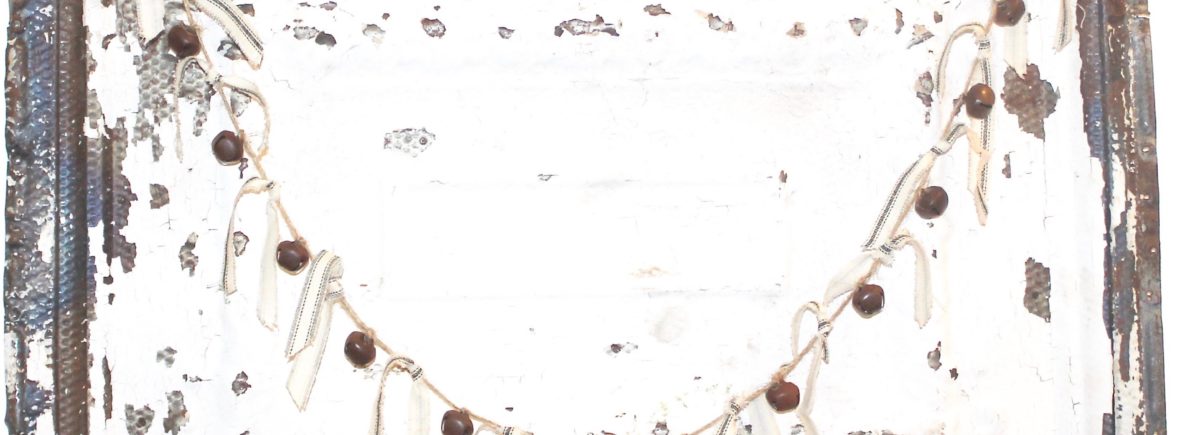
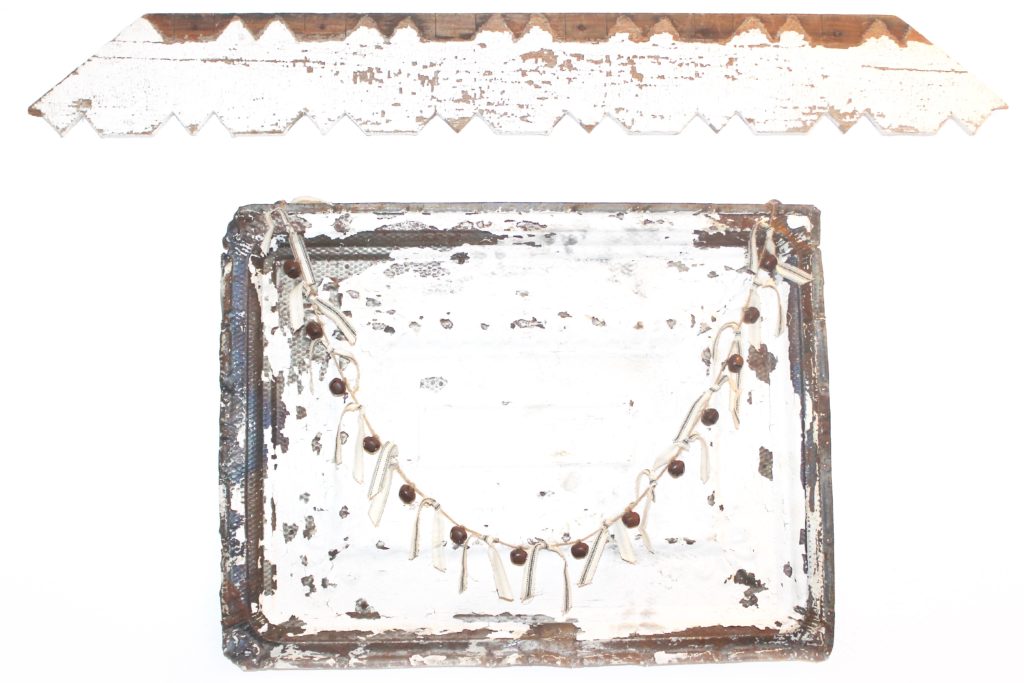
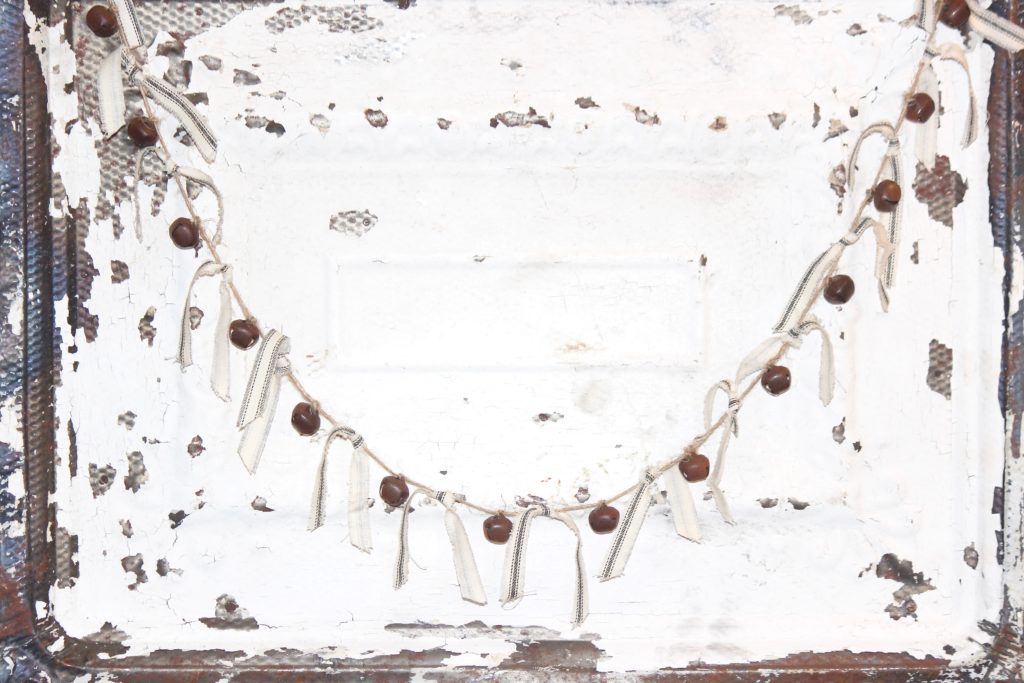
I rusted some little jingle bells for a craft I did recently, and I had a bunch of jingle bells left over. These cute little rusty bells sat in a bowl for a couple of weeks before I decided that a jingle bell garland would be super cute, and super easy to make! You can see the adorable jingle bell garland below, hanging over a piece of old tin I have hung up in our hallway.
***
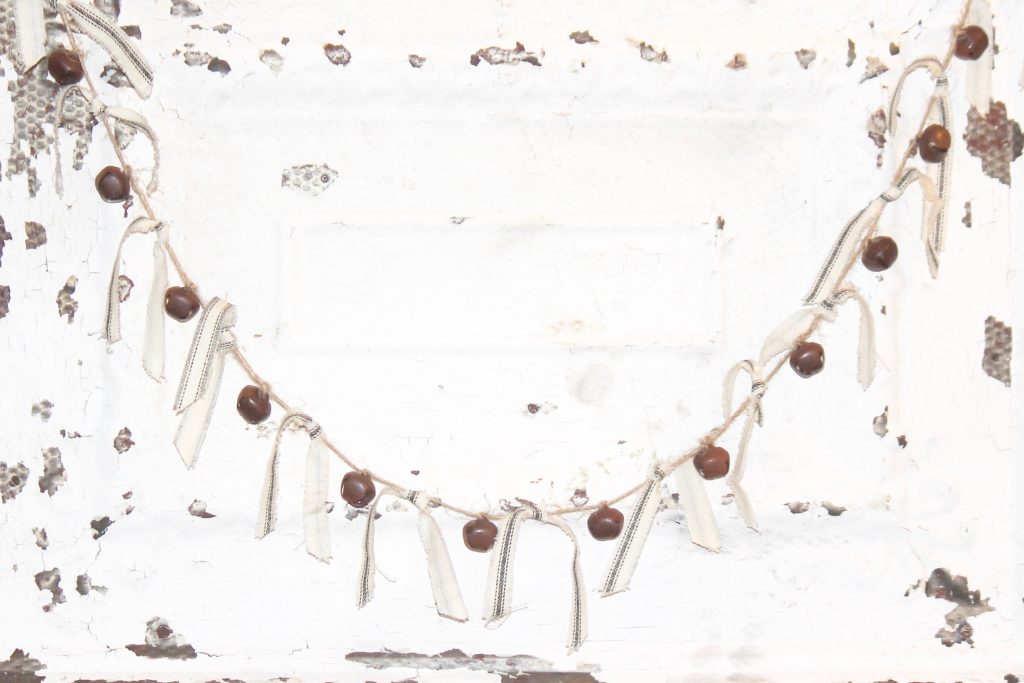
It’s super cute right?! You know you want to make one 🙂
Supplies:
- Spray paint (to create the faux rust finish on the jingle bells) – I used these colors: Espresso (satin finish) Spray Paint, Warm Caramel (satin finish) Spray Paint, and Flat Red Primer Spray Paint
- Jingle bells – These jingle bells are the ones I used, but here is another option from Amazon.
- Twine – click here to shop Michaels twine, or click here to shop twine on Amazon
- Fabric – I bought my fabric at Hobby Lobby (it’s not online right now), but here are some options from Amazon.
- Scissors
Disclosure: My posts may contain affiliate links. If you buy something through one of those links, you won’t pay a penny more, but I may receive a small commission, which helps me keep this DIY blog up and running, and partially supports my Coke Zero addiction. This includes links to amazon.com, because I am a participant in the Amazon Services LLC Associates Program.
Instructions:
- Paint your jingle bells by following the How to Paint a Faux Finish tutorial.
- After the bells have dried, you’re going to restring them on new twine. Cut a long piece of twine – cut it about a foot longer than your desired finished length.
- String one jingle bell on the twine, leaving a “tail” of extra twine at the end. I usually leave about a foot of extra twine at each end just in case I need it for hanging purposes. It’s always better to have too much rather than not enough!
- Once you get the jingle bell where you want it, tie the twine in a knot over the top of the jingle bell so that the bell can’t move.
- Now string another bell on the twine about 2.5″ over from the first bell, and tie the twine in a knot on top of the bell.
- Keep stringing and tying bells onto the twine about 2.5″ apart. (I used 18 bells total).
- Now cut strips of fabric. The strips I used were all .5″ x 7″

- Fray the strips of fabric by using your fingernails to pull away fibers from the edges of the fabric. If you can’t get any fibers separated with your fingernails you can use a straight pin or a safety pin.
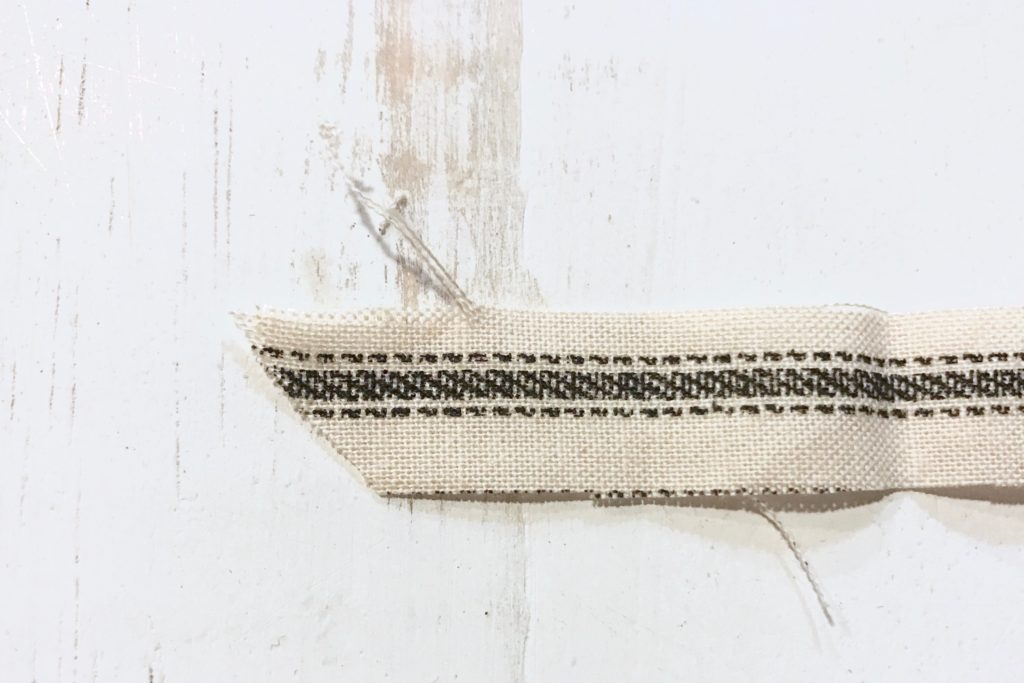
- Once you get some of the fibers separated from the fabric, pull on them to unravel the entire edge.
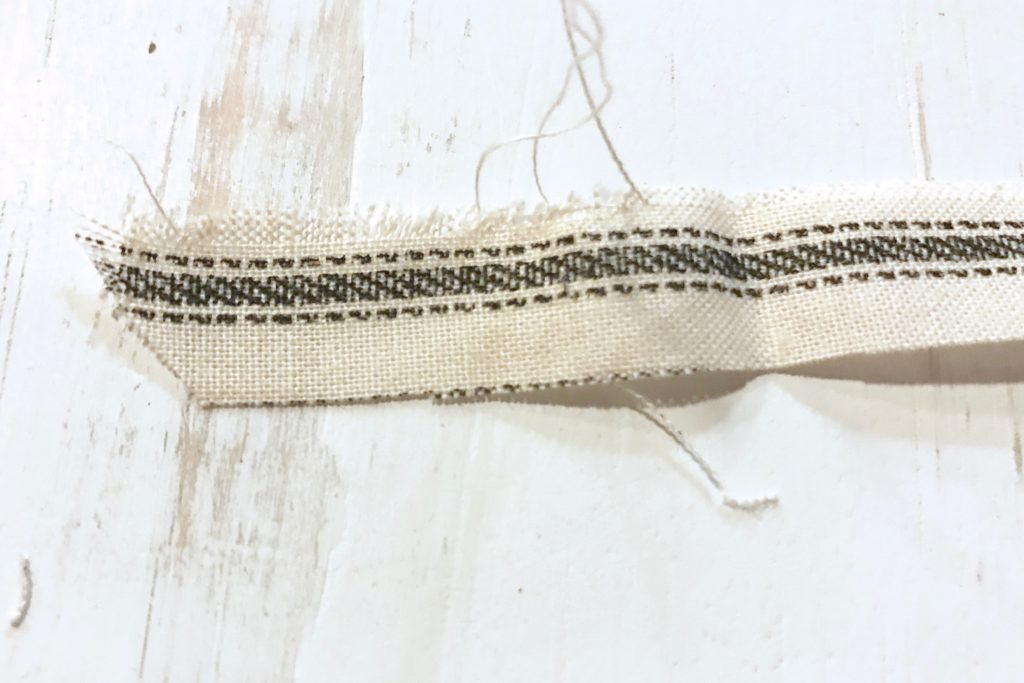
- Keep doing this until the edge is frayed the amount you want.
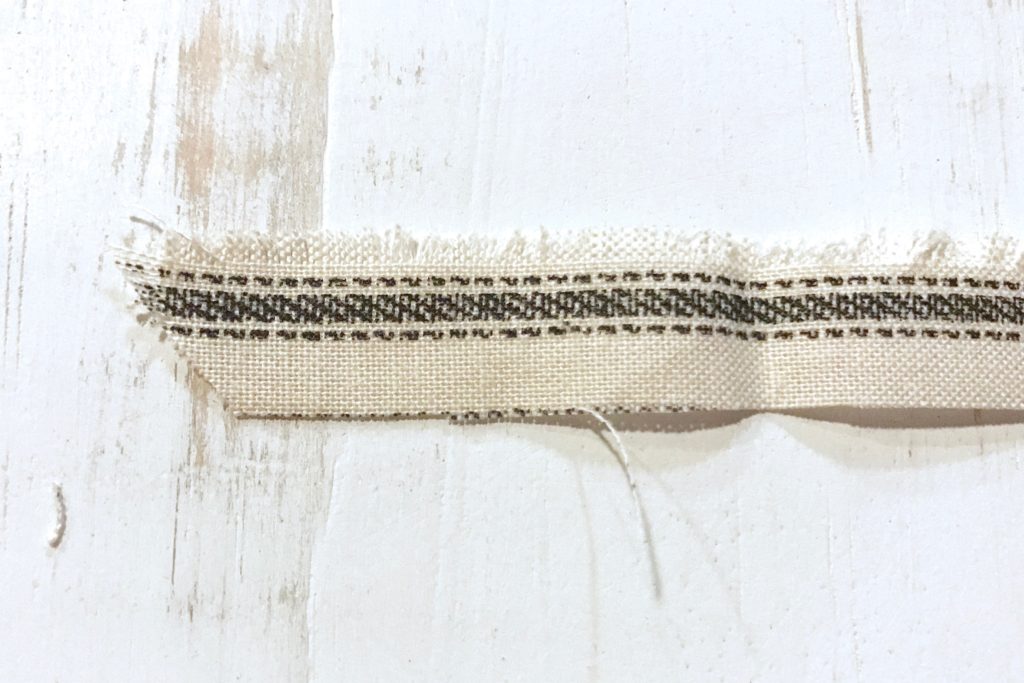
- Now fray the other side.
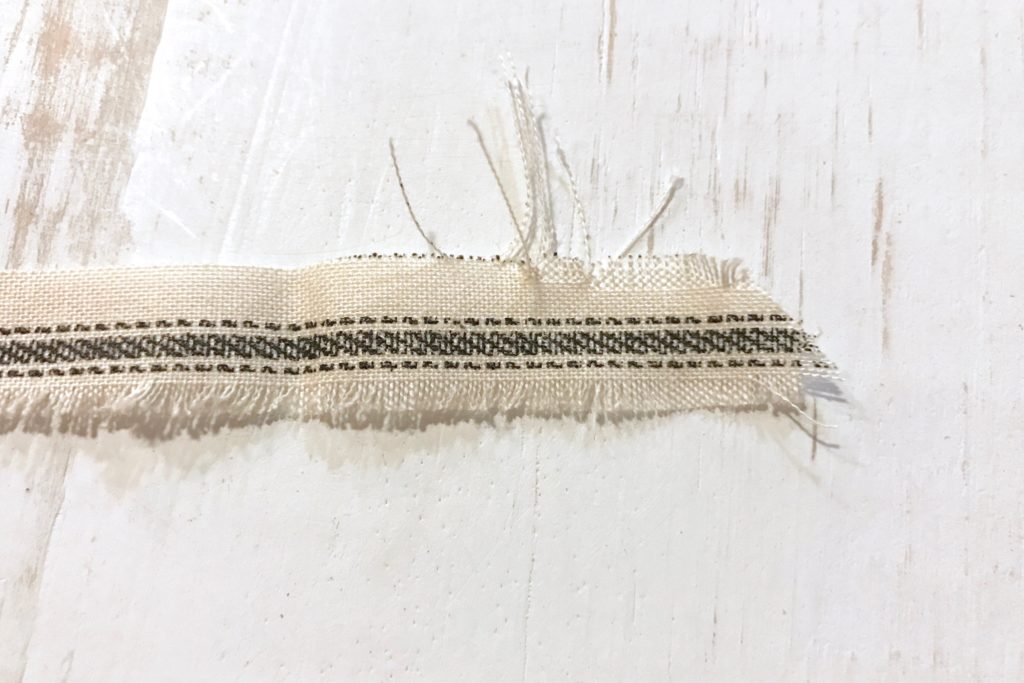
- Continue fraying all of the strips of fabric.

- Tie the strips of fabric onto the twine, in between the jingle bells.

- Now hang your adorable jingle bell garland wherever you want!
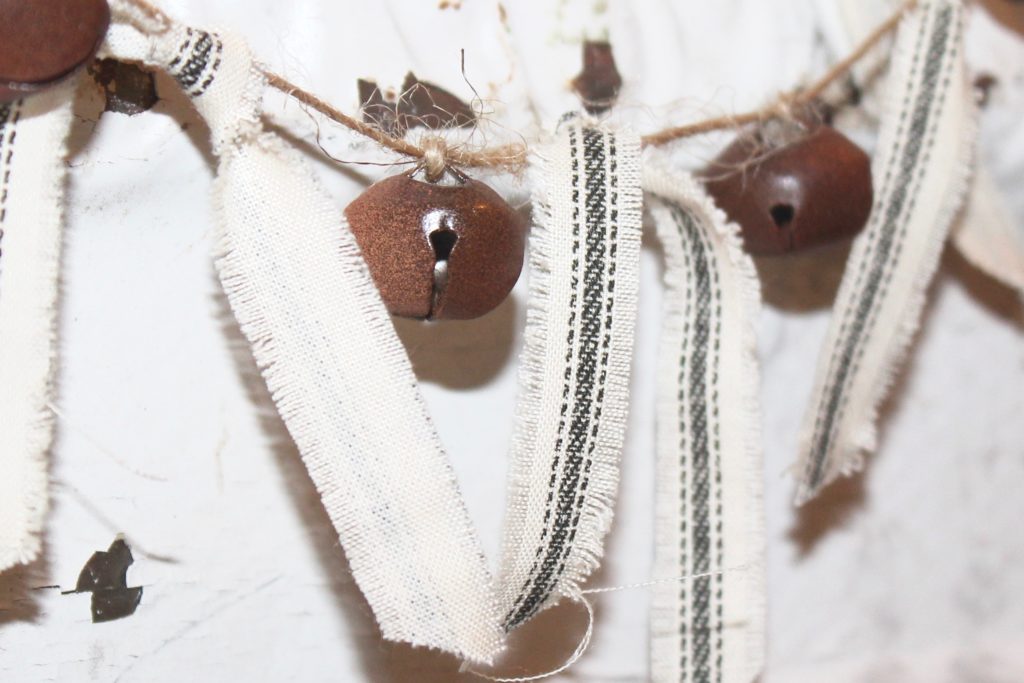
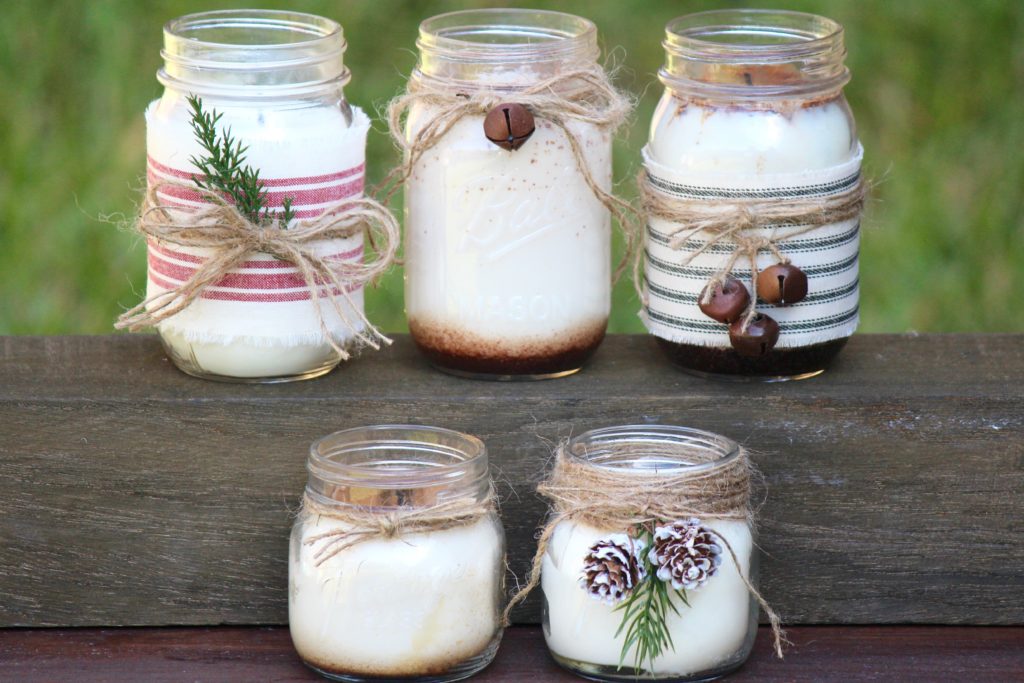
While you’re here, check out some of my most popular posts! (*notice those cute little rusty jingle bells on the candles below!)

How to Hand Knit a Chunky Blanket

Never miss a post!