These DIY Alphabet Crayons are so cute, and your kiddos are going to love playing with them! They also make great party favors or gifts.
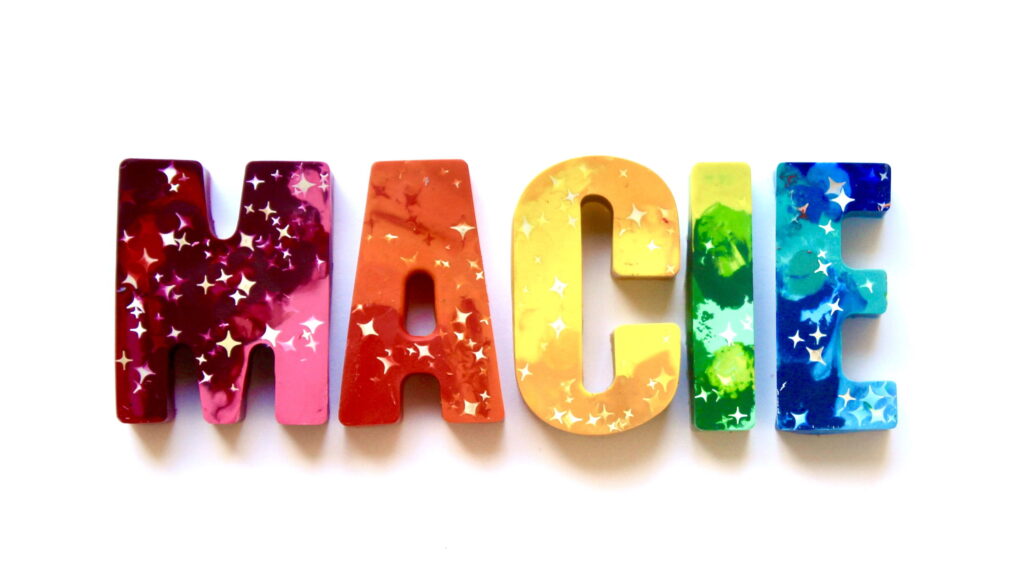
Wouldn’t it be cute to give your kid or their friends a personalized set of crayons that spells out their name?!
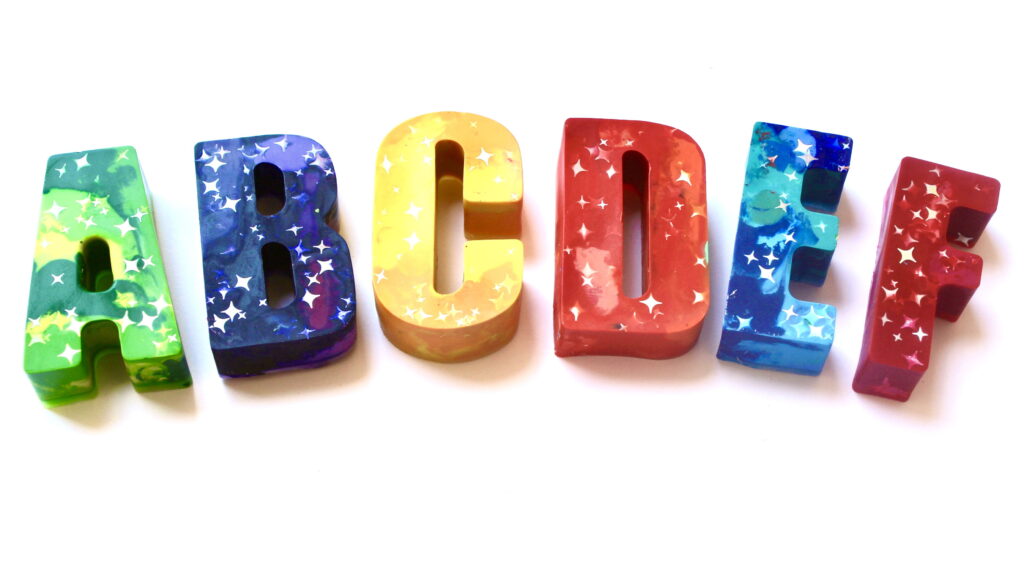
Or a whole alphabet set for them to play with!
 Supplies:
- alphabet mold– this is the exact one I used
- crayons – shop Michaels here, or Amazon here
- glitter – shop Michaels here (this is the glitter I used), or Amazon here
- craft knife – shop Michaels here, or Amazon here
Disclosure: My posts may contain affiliate links. If you buy something through one of those links, you won’t pay a penny more, but I may receive a small commission, which helps me keep this blog up and running, and partially supports my Coke Zero addiction. This includes links to amazon.com, because I am a participant in the Amazon Services LLC Associates Program.
Instructions:
Watch the video below to see how easy it is to make these crayons, or scroll below the video to read the instructions.
Step by step instructions:
- Preheat the oven to 300 degrees.
- Pick out all of the crayons you want to use. It doesn’t matter if they are already broken, or still whole. This is a great time to use all of those little left over pieces of crayons that your kids don’t use because they’re broken.
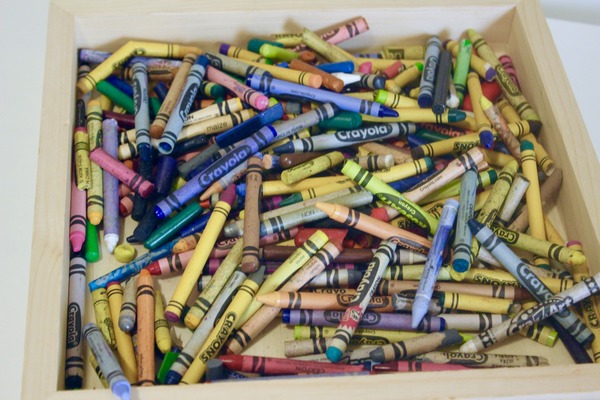
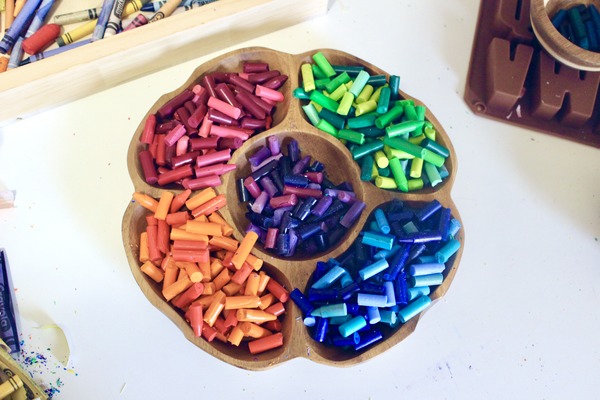
- Separate the crayons into color families.

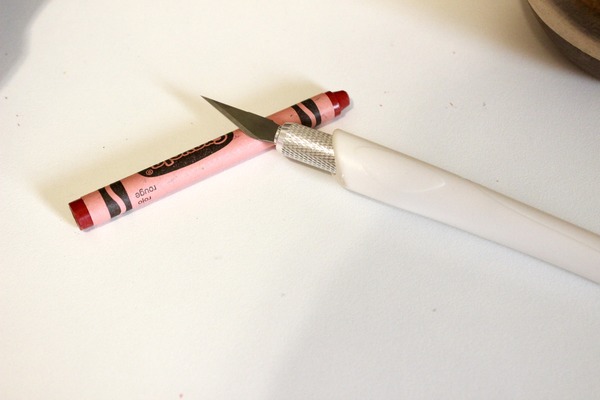
- Peel all of the paper off of the crayons. It’s very time consuming to peel them by hand, so I used a craft knife to cut the paper, and then pulled it off. Please be careful cutting the paper off – those craft knives are very sharp!
- Break all of the crayons into small pieces. Each full crayon should be broken into 4-5 small pieces. Just use your hands to break them into small pieces – no knife needed for this part! Yay!
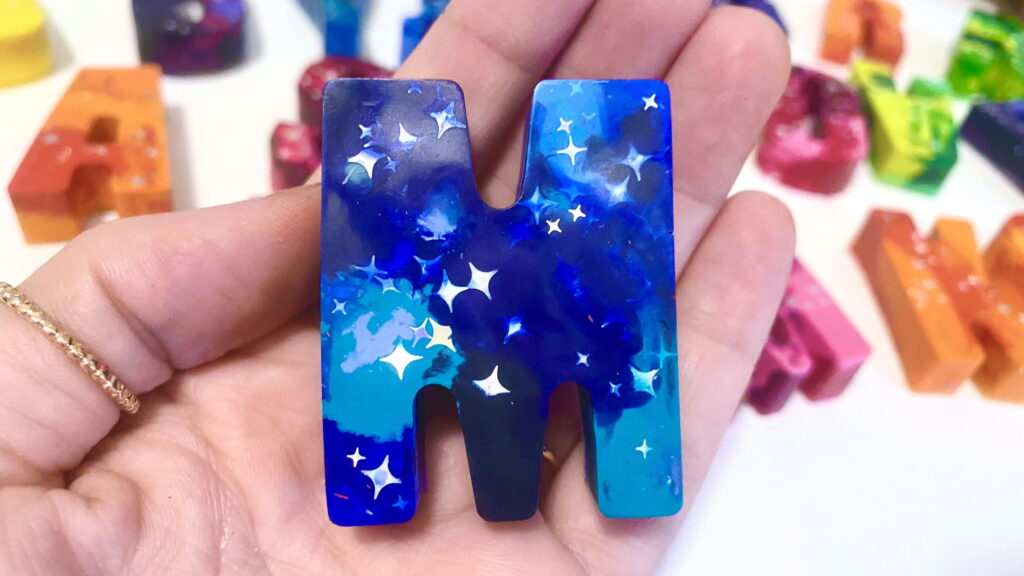
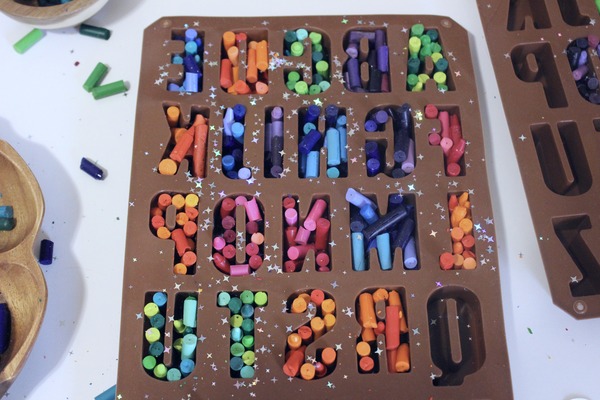
- I decided to add glitter to these crayons to make them even cuter. Just sprinkle the glitter into the bottom of the letter molds.
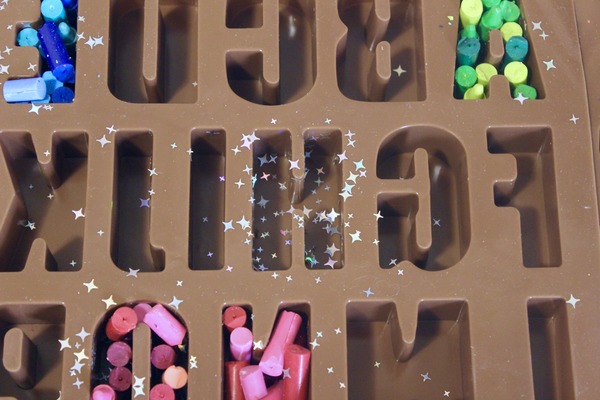
- Put the crayon pieces into the letter molds. I did my letters by color family. So one letter might have shades of pink/red, and one might be shades of blue, etc. But you could definitely do rainbow crayons, or a blue/green mix, or whatever you want. Sometimes I stood the crayon pieces up vertically, and sometimes I laid the pieces down flat. I was not anal about how I did it. The main thing you need to concentrate on is filling the mold completely, with no empty gaps.
- Put the letter mold on a cookie sheet.
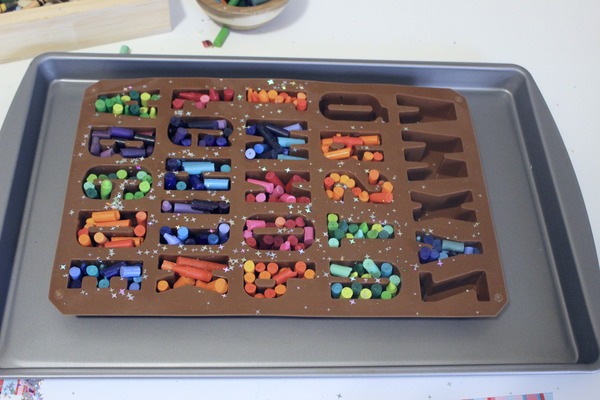
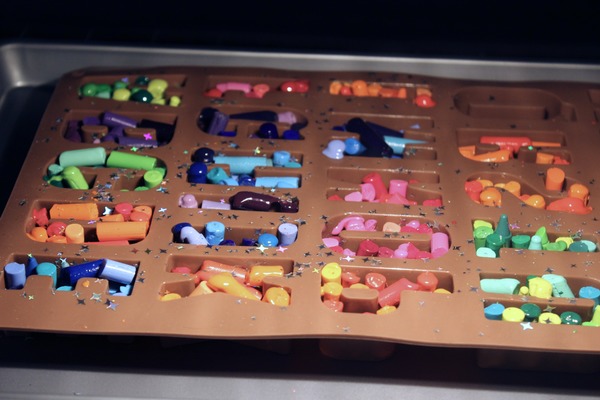
- Put the cookie sheet in the oven. These will take about 10-15 minutes. You want to keep an eye on them, and pull them out when the wax is completely melted. (The pic below is after 7 minutes in the oven)
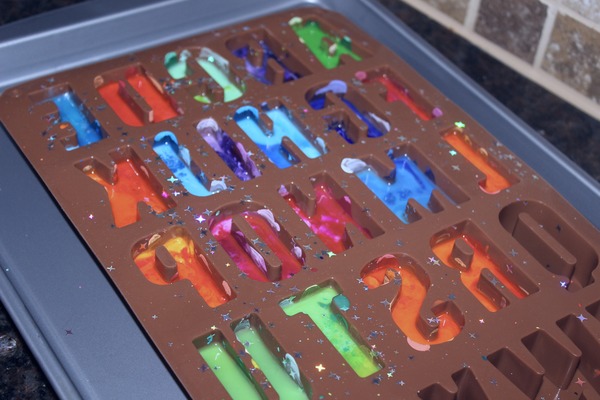
- After the wax is fully melted (mine took 15 minutes), pull them out of the oven and set the cookie sheet on a trivet so they can cool off and set up.
- After they are fully cooled off, pop them out of the silicone mold. I waited a full 24 hours to pop them out of the mold. To take the crayons out, just pull the silicone mold back and pull the crayon out. You do not have to be too gentle with the molds.
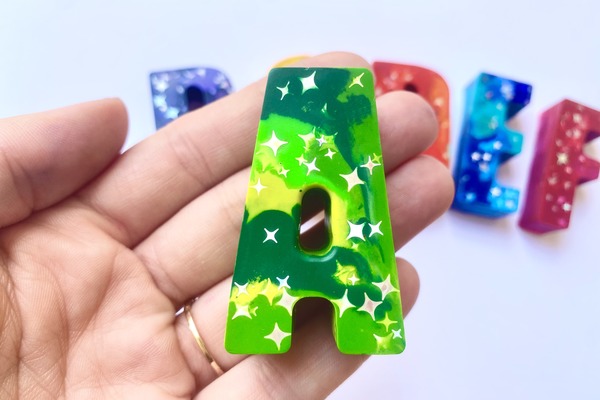
- Woo hoo! You’re done, and you have adorable alphabet crayons!!!
*To wash the molds, I just washed them by hand with warm, soapy water. Then they can be reused again!
While you’re here, check out some of my other popular crafts!


How to Hand Knit a Chunky Blanket

Never miss a post!